Rossum
- 01 Feb 2024
- 10 Minutes to read
- Contributors

- Print
Rossum
- Updated on 01 Feb 2024
- 10 Minutes to read
- Contributors
- Print
Article summary
Did you find this summary helpful?
Thank you for your feedback!
ROSSUM is an application that uses a complex algorithm for document extraction, especially invoices. INSIO Software communicates with ROSSUM using an API and it is possible to achieve two-way communication between applications. As implemented, the ROSSUM integration supports sending a document from the INSIO application to ROSSUM, where it is extracted and the extracted data is sent back. Invoice fields are then populated from the extracted data.
Registration and configuration of the ROSSUM account
Due to possible changes in the UI of the ROSSUM application, it is not practical to list here the individual steps of registration in ROSSUM. It is worth mentioning that if we register a new account, for example for a trial and we do not want to specify the real email and company (may lead to unwanted flooding with advertising messages), then we invent the company name and create a new confirmation email, for example at ProtonMail (proton.me).
Due to ROSSUM registration policy, it is not possible to create new accounts with generic email addresses under the domains "gmail.com" or "seznam.cz".
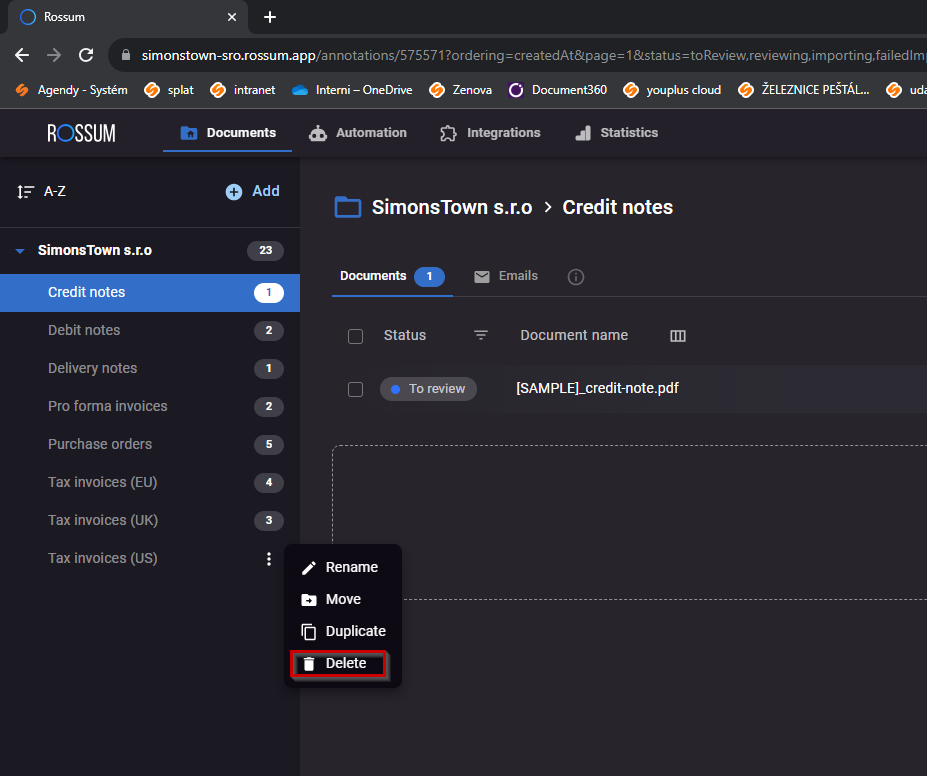
Once we have a ROSSUM account set up, it's time to adjust the account settings so that it can be connected correctly. First, we reduce the automatically created queues so that only the Tax invoices (EU) queue remains. Clicking on the three dots to the right of the queue name will open a list of actions that can be performed on the queue. Select the Delete action.
When Delete is pressed, the Delete que warning window is called. Check both checkboxes here:
- All documents and all extracted data will be deleted
- Document usage data will be deleted from statistics
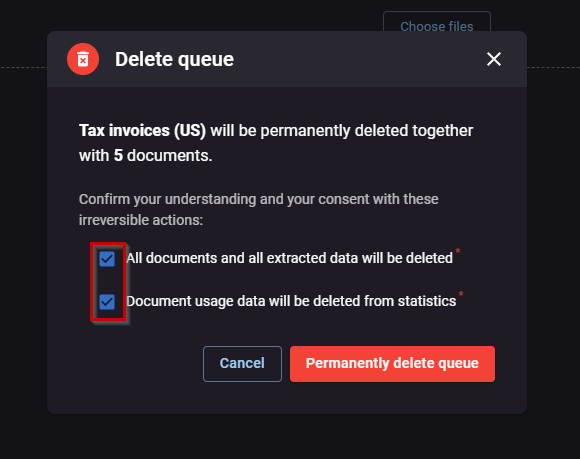
Confirm the deletion of the queue by pressing Permanently delete queue. Do the same for the remaining queues (except Tax invoices (EU)). Once all redundant queues have been deleted, you need to specify the extraction process and the required extracted fields for the Tax invoices (EU) queue:
- Documents > Queue Settings- Fields to be mined
- Basic Settings - Confirmed Tab Unless otherwise specified by process, then uncheck the Use Confirmed Tab option. In this state, no further confirmation will be required after the initial confirmation of the invoice and the export will proceed directly. Usually there is no need to change the basic settings any further.
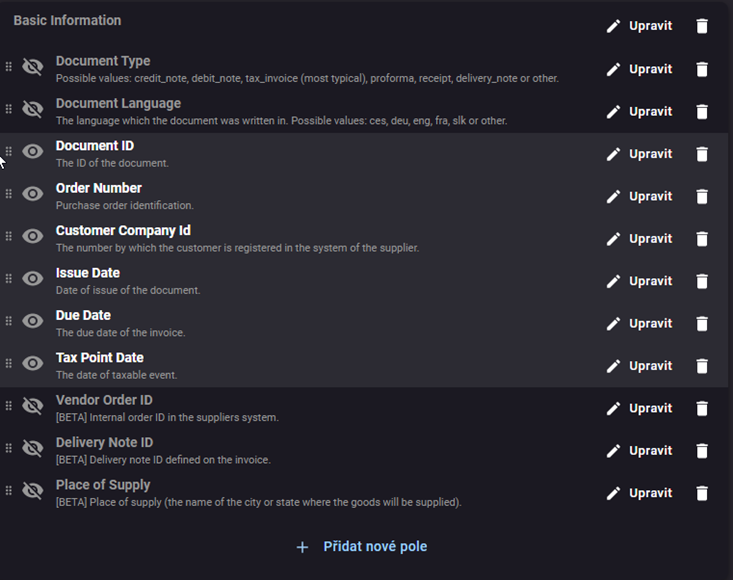
- Field to be extracted - Probably the most important part of the configuration process on the ROSSUM side. It is necessary to think properly which fields we want to mine. The more fields we choose, the more chance that the application will be unsure of some fields and we will have to make manual corrections. An overview of the basic fields to be mined (however, it depends on the usual format of the invoices we receive):
- Order number - This field is the key to transfer the invoice number.
- Customer ID - This is used for the customer ID number. Usually there is no need to extract this as the integration is tied to a single customer.
- Issue date - Invoice issue date
- Due date - Invoice due date
- Tax point date - Date of taxable transaction (TDS)
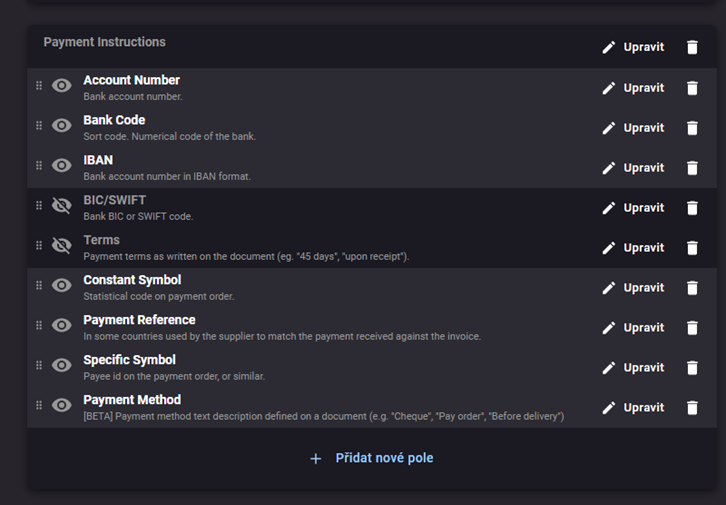
- Account number - Account number for payment
- Bank code - must be set together with Account number, otherwise the account number will not be complete. For the correct extraction of the account number, the bank code must be entered in INSIO. Banks)
- *IBAN - We do not use this field yet, but it will probably be implemented.
- *SWIFT - We do not load this field yet, but it will probably be implemented.
- Constant symbol - Constant symbol
- Payment reference - Variable symbol
- Specific symbol - Specific symbol
- Total amount - total amount including VAT
- Total without tax - Total amount without VAT rate
- Amount paid - amount already paid
- Currency - Currency
- VAT Rates - VAT rates
- Vendor VAT number - VAT number of the supplier
- Customer name - Customer name (less important - automatically filled in according to VAT ID)
- Customer company ID - used for the customer's ID number. Usually there is no need to extract as the integration is linked to a single customer. Customer VAT number - customer's VAT number
- Line items - Individual invoice items invoiced
Note: We do not provide information about the address of the supplier and customer. They are automatically filled in from the ARES database, according to the registration number. Similarly, there is no need to extract the name of the supplier and customer. If the customer or supplier is not created, these entities will be created if the ID number is found in the company database. (To create entities, in the integration process, this option must be enabled)

Extracted fields - Vendor & Customer: fields containing key information about the customer and supplier. The Customer Company ID field in this case is identical to the Customer ID field in the Basic information section and refers to the customer ID.
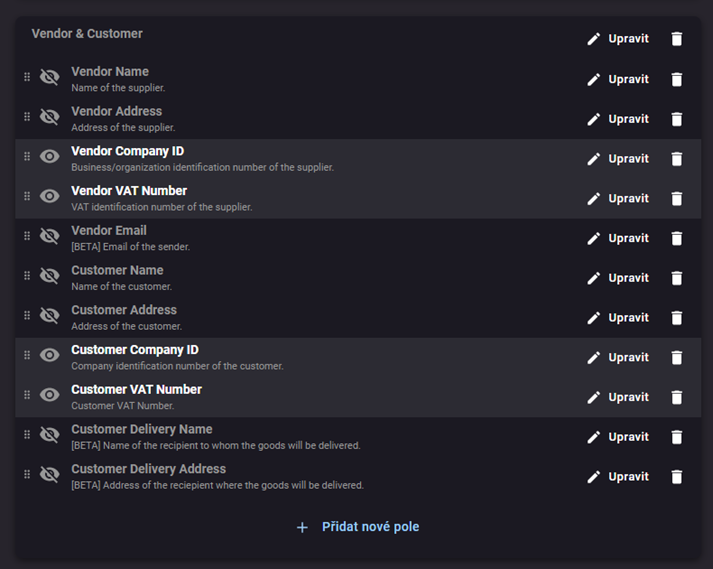
- For individual fields, it is possible to configure advanced field parameters by clicking Edit. For example, it is possible to set the allowed format, the user name, or the obligation to fill it in:
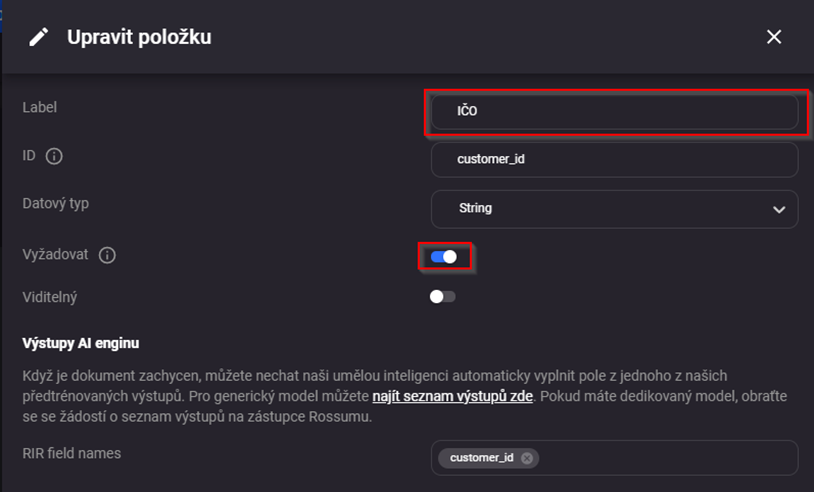
- For example, if you want to rename the Customer Company ID field to Customer ID and also strictly require this field on any invoice, then click Edit on this field. In the item detail, we will then edit the Label field to the desired name (in this case, ID) and activate the require parameter. However, do not change the ID field (if you change this field, the application will not be able to correctly match the information from ROSSUM).
- Automation tab
- Automation - select No automation. Later we can switch to partial or full automation (the invoice will be submitted if the algorithm is sure enough of the extracted fields). When selecting No automation we have to manually confirm each of the extracted fields (suitable for initial initialization and in cases where the application receives invoices from a large number of suppliers with different invoice formats).
As we have already encountered cases when in the new Rossum account some fields had different IDs than Rossum had in the basic settings, please see below the table with the ID and the field to which the given value is then written in the INSIO application.
Table of INSIO IDs and fields
| ID | INSIO value |
|---|---|
| order_id | Order number |
| issue_date | Date of issue |
| date_due | Due date |
| date_uzp | DUZP |
| var_sym | Variable symbol |
| account_num | Account number |
| bank_num | Bank code |
| internal_notes | Note |
| sender_ic | Supplier ID |
| recipient_ic | Customer ID |
| recipient_dic | Customer ID |
| amount_total_base | Total price excluding VAT |
| amount_total | Total price |
| currency | Currency |
| amount_paid | Paid |
| tax_detail_rate | VAT rate in the Recap section |
| tax_detail_base | Base in Recap section |
| tax_detail_tax | VAT in the Recap section |
| table_column_description | Item name |
| table_column_quantity | Quantity of item |
| table_column_uom | Quantity of item |
| table_column_rate | DPH of the item |
| table_column_amount_base | Price/MJ without VAT of the item |
| table_column_amount | Price/MJ with VAT of item |
| table_column_amount_total_base | Total without VAT items |
| table_column_amount_total | Total with VAT items |
Configuration in the INSIO application
- Administration menu > Integration
- New integration - ROSSUM
- Fill in the basic data:
- Name - Any string
- Default Entity- Default entity that will be assigned if no entity is specified in the invoice.
- Module - Purchase > Invoices Received
- Description (optional field) - Any string
- Active - check the option
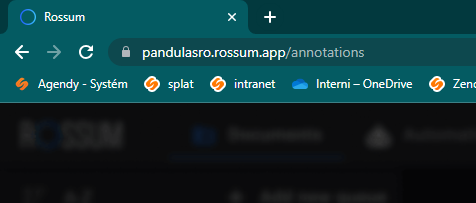
- Rossum url - Enter the first part of the URL assigned by the ROSSUM application and add the string "/api/v1" at the end. The main part of the url can be found in the url bar of the browser after logging into rossum. Example of a compound Api URL: https://pandulasro.rossum.app/api/v1
- Fill in the basic data:
* Login name - email used to log in to the ROSSUM application
* Password - Password used to log in to ROSSUM
- Bindings:
- Select which documents we want to pair with the application and then select the appropriate module (default Purchase > Invoices received).
- Settings:
- Default agenda - Select the appropriate agenda, with the appropriate workflow process
- Attachment type - Scan, or the corresponding attachment type (PDF,...)
- Export - Check the option
- State to export - i.e. the initial state of the synchronization process. This is the WF state in which a document (usually an invoice) is automatically uploaded to ROSSUM
- State after export - this is the WF state to which the invoice is moved after the document is successfully sent
- Import - check the option
- Import State - The state in which the application will wait for the upload of data (extracted fields) from ROSSUM. After import, the fields of the invoice detail will be automatically filled in, which correspond to the extracted data.
- State after import - State to which the invoice is moved after successful import, from ROSSUM
It is also worth noting the form fields Last sync: and Last import date which can be used to see if the data is being transferred between applications as required.
- Administration menu > Invoince.Received.Import - Start service. After this action, in some cases, the application needs to be restarted on the server side. Advanced service settings:
- E-mail - The email that the application will log into every minute and accept incoming invoices if they are recognized. This mailbox must be set up in the email settings.
- Furthermore, ROSSUM integration is directly dependent on the correct configuration and running of the service InvoiceReceived.Import. Without setting it up correctly, the integration will not work properly.
Scenario of use:
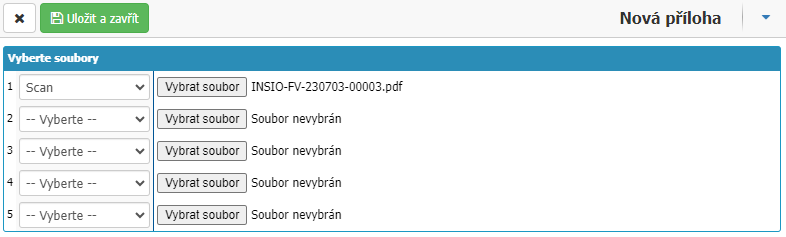
In the Received Invoices module (issued invoices overview form) select New document. Select the appropriate agenda and the customer for which the appropriate ROSSUM integration is selected and fill in the other mandatory fields. Save the record (Save). Now the field for adding a document is displayed. Add a document of type Scan (or the appropriate format identical to the settings we selected when implementing the integration)
Press Save and close. Now the application sends the invoice to ROSSUM and changes the status of the invoice according to the integration settings (e.g. from New to Enrolled for extraction)

Status after import into ROSSUM:

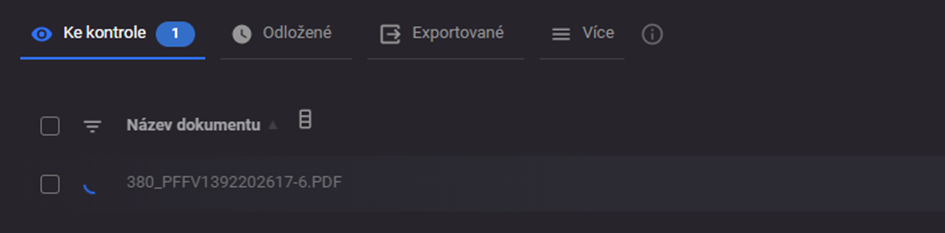
After uploading the invoice, click and check all fields

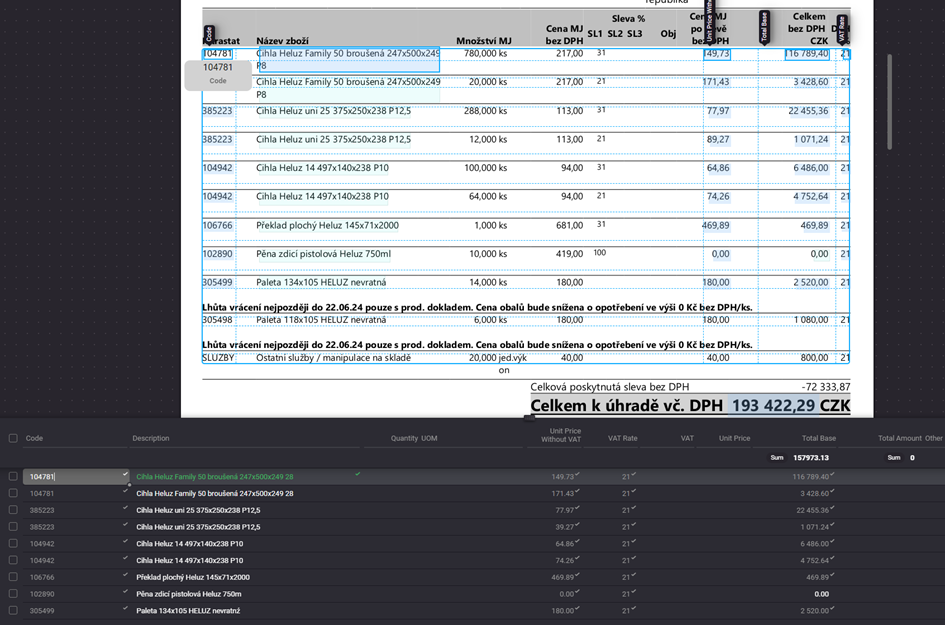
If any of the fields do not match, make a manual correction (ideally by selecting the appropriate field/field range, not by manually entering a value). If any of the invoiced items do not fit, they can be adjusted in the Line items - Line item section. For an example, see the image - manually removing the last two lines, telling about the return period, which the application mistakenly evaluated as invoice items
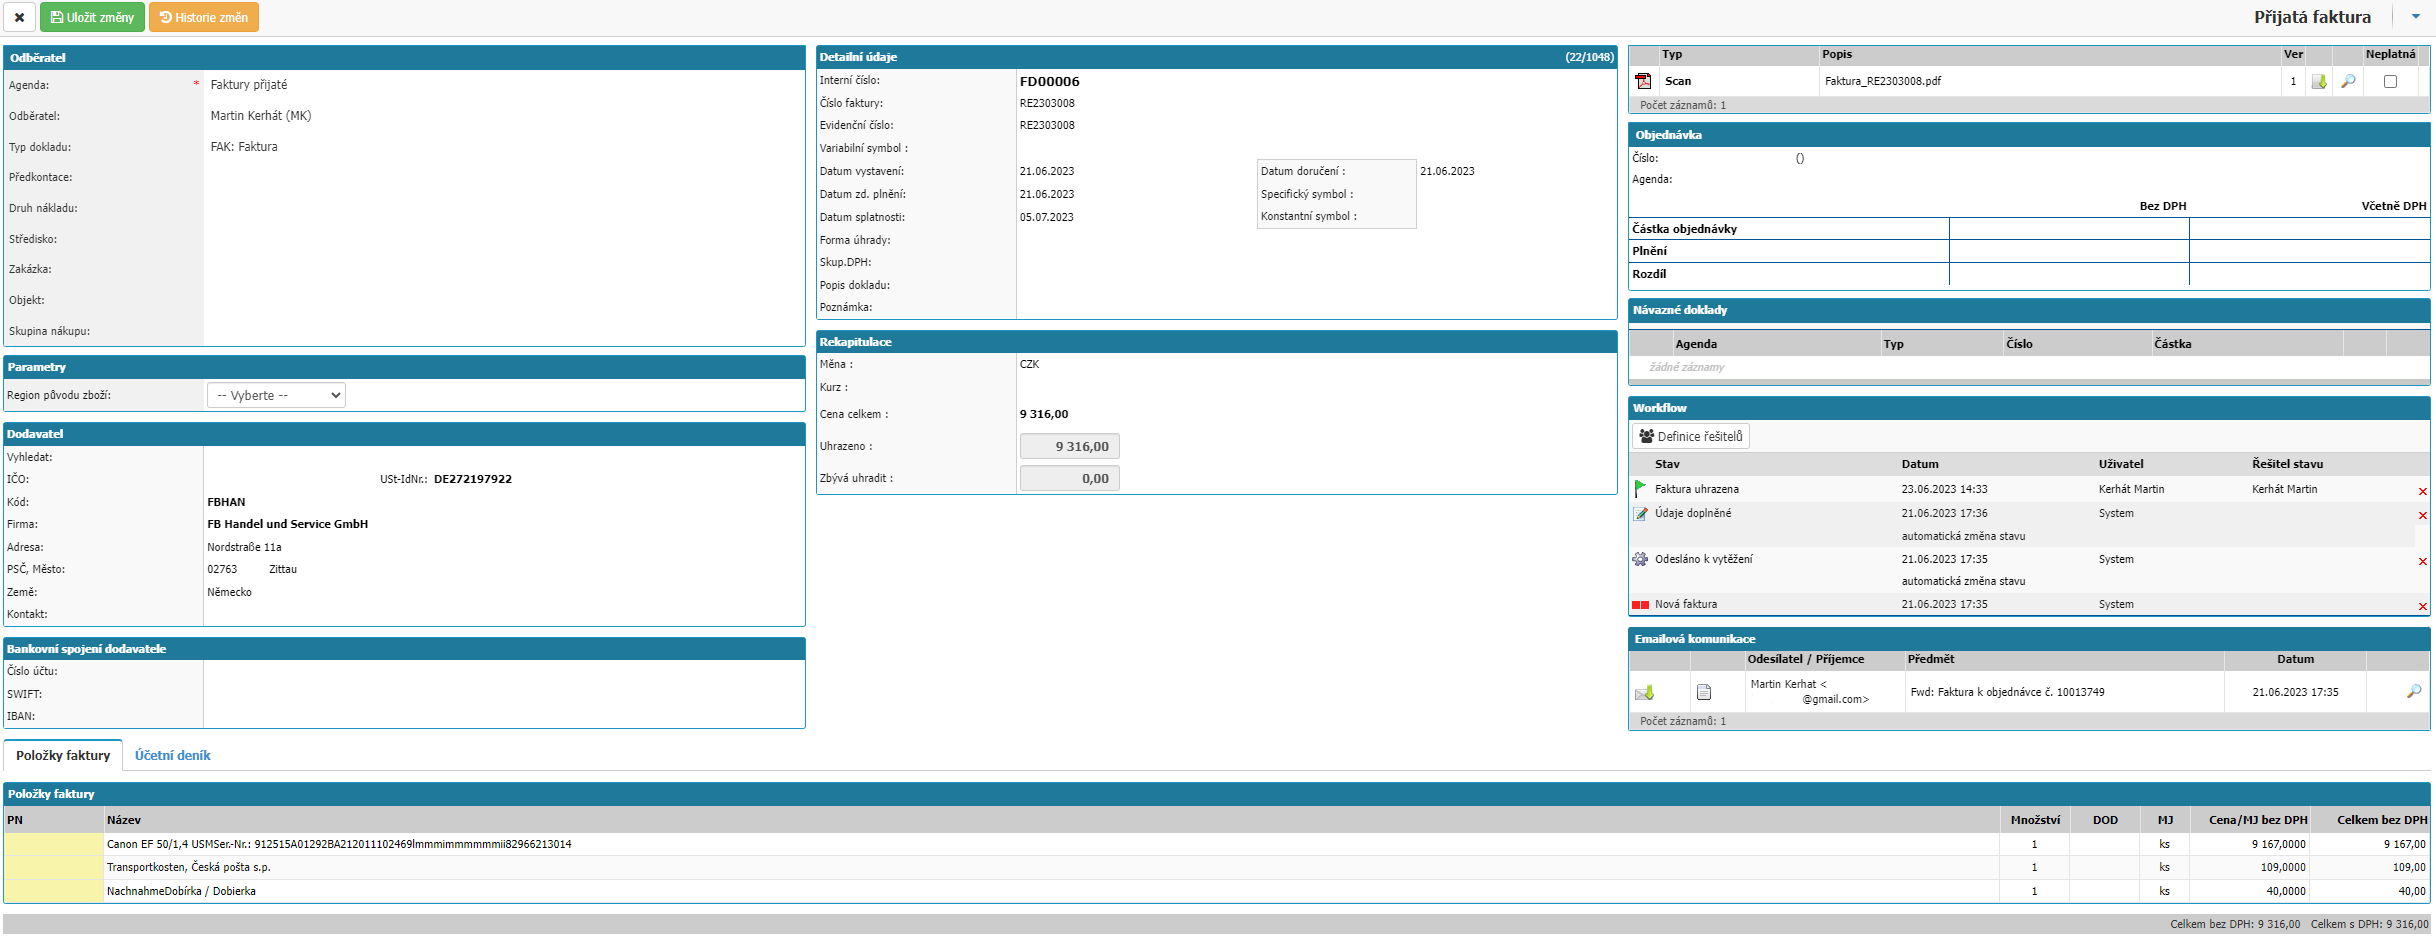
When you are satisfied with the content of the extracted fields, press Confirm. The invoice in its modified form has now been transferred to the Exported queue where the export status can be monitored. In INSIO we can now see in the Invoice Received Overview window that the status of the invoice has been shifted, according to the integration configuration (e.g.: from Enrolled for extraction to Extracted). After clicking on the invoice we can see that the extracted fields and invoice items have been completed. The address is not extracted directly from the invoice field, but added based on the information from ARES, according to the ID number/INSIO (the address of the supplier on the invoice may not correspond to the address assigned in INSIO)
Invoice creation based on email communication
In addition to manual entry into the system, invoices received can also be created automatically based on incoming e-mail. If the service is set up correctly InvoiceReceived.Import, then when the email arrives at the predefined mailbox, an invoice is created. According to the attachment type settings, a document is imported which, if it matches the document type from the integration settings, will be sent for extraction.
Was this article helpful?