
Application with users communicates mainly through emails. It is capable of collecting inboxes from one or more email boxes and sending emails through these boxes as well. Inbox selection is useful for example for creating new requests to the helpdesk or reading responses to sent purchase orders. Sending is primarily used to send notifications to users about events in the application (change workflow), but also for sending orders, issued invoices, etc. SMTP is supported for sending emails and POP3, EWS(Microsoft) and MAPI for receiving.
In the administration, you can find the option to set up email boxes that the application will use under Administration menu > Emails > Email boxes.
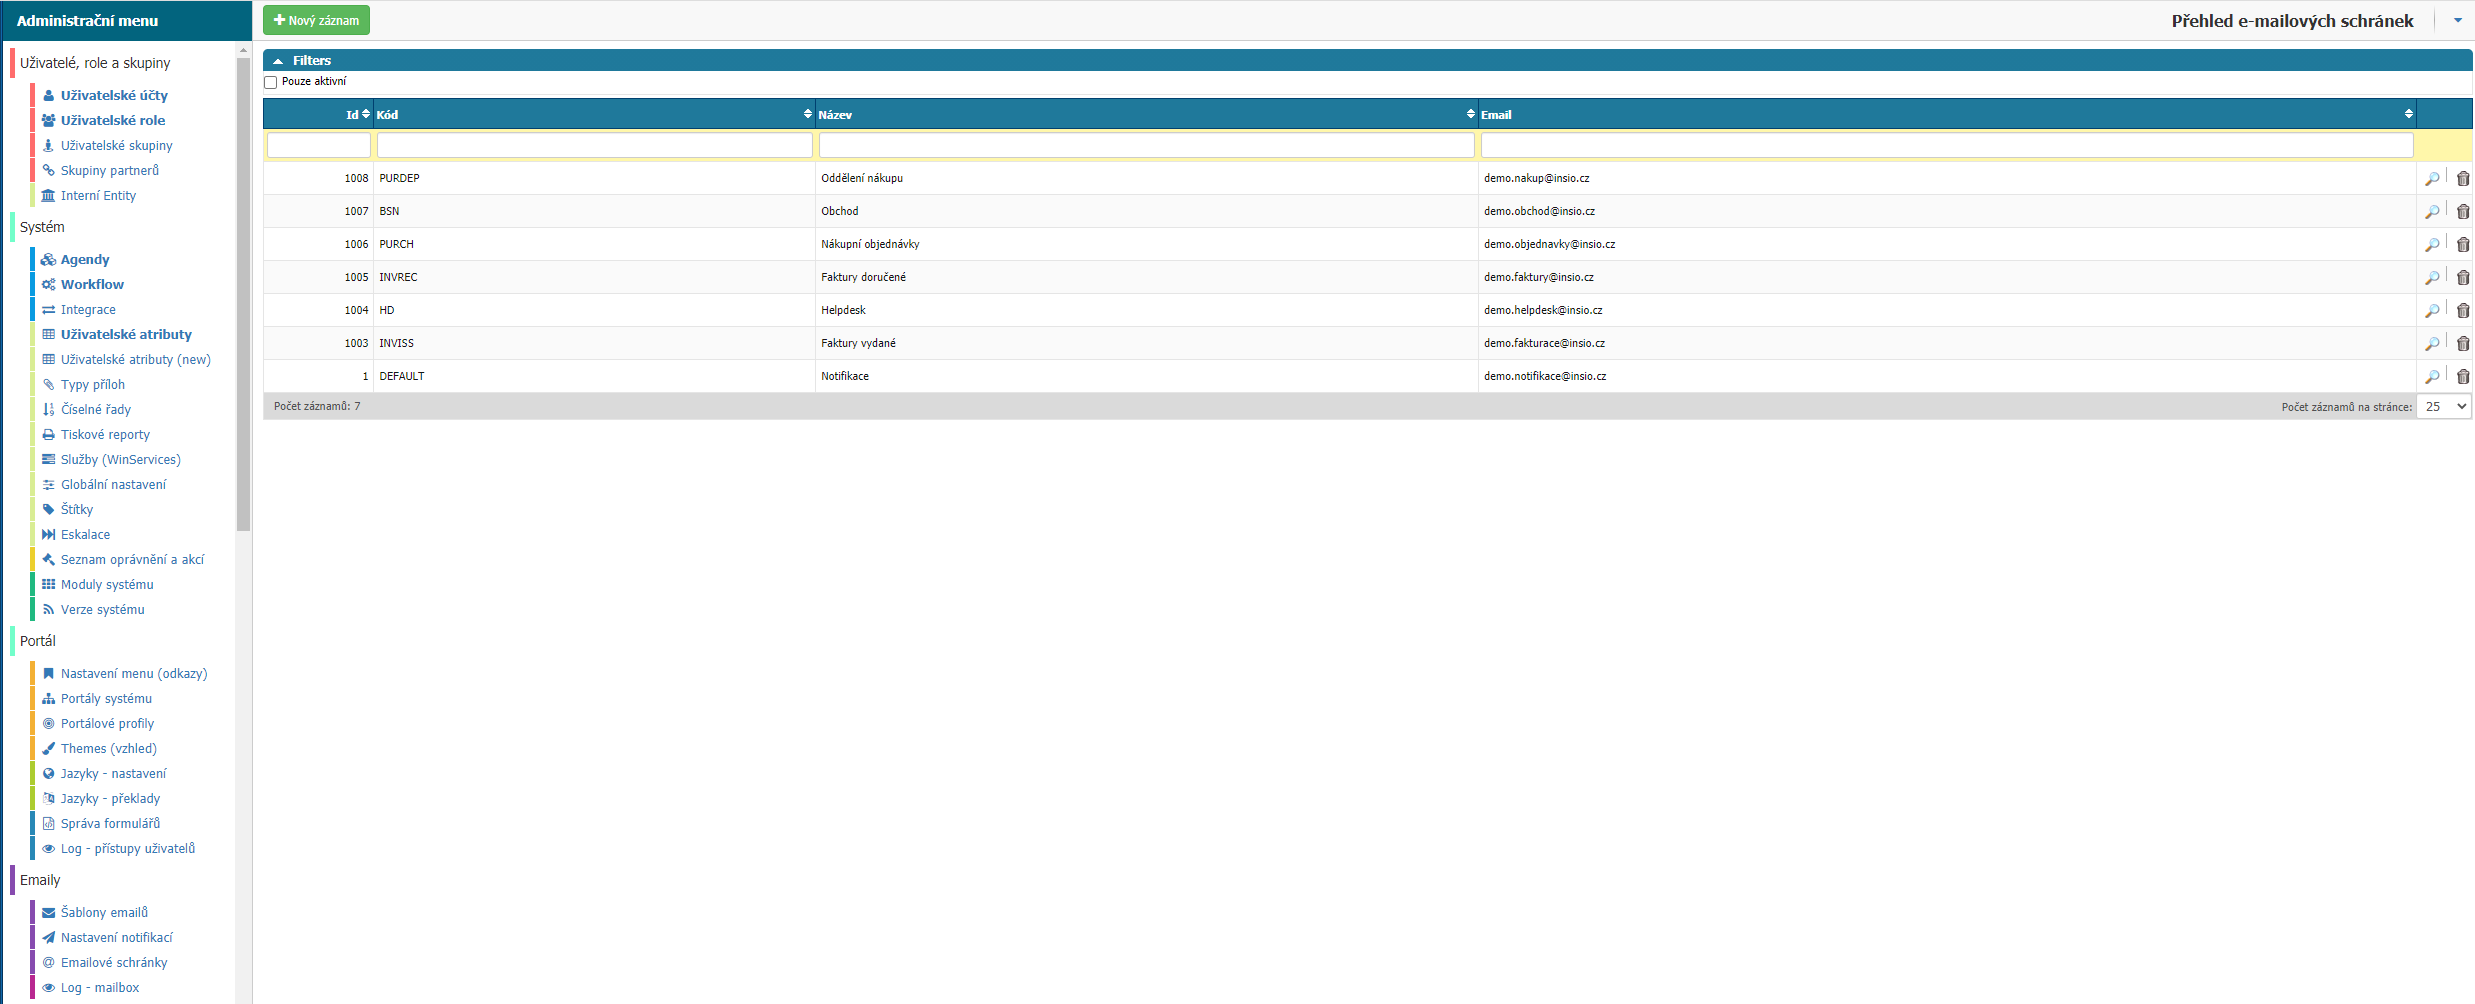
Overview
The overview shows all email boxes that are set up in the application.

In the filters you will find the option to filter only active mailboxes.

Use the magnifying glass option to open the settings of a specific mailbox for editing.

You can delete your email inbox from the app via the trash options.

New record

The option will open a dialog box where you can set up a new mailbox for the application.
Preset

In the preferences you will find template settings for the most commonly used mailboxes. Office365, List, Gmail. (Server and port settings)
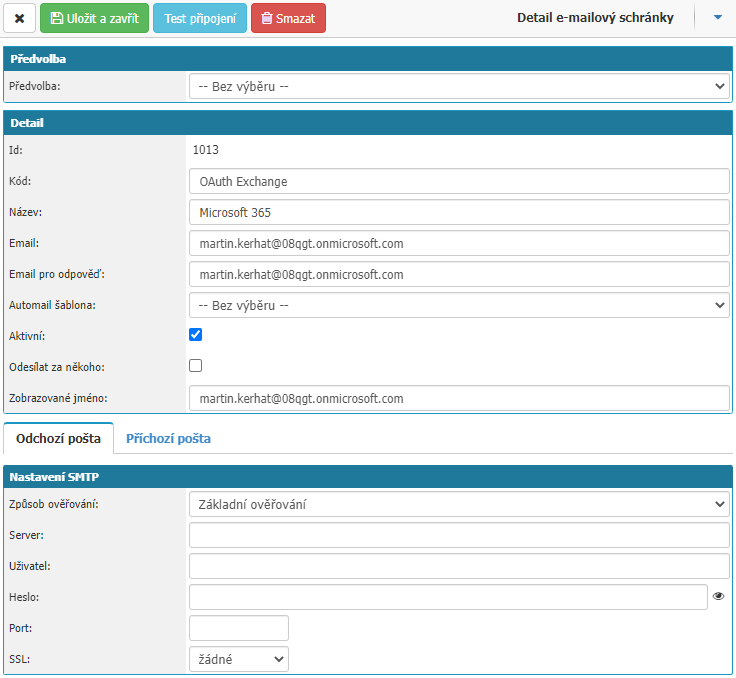
Detail
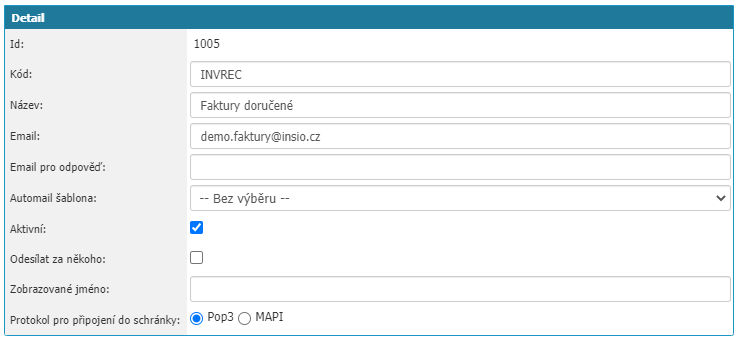
- ID - mailbox ID, is assigned automatically by the application. It is used in the application during setup to define a specific mailbox.
- Code - You define a code label for the email box in the value. For example, DEFAULT. The application works with some codes automatically just for example the DEFAULT code that will designate the email box that the application will use to send some notification emails.
- Name - You define the name of the mailbox in the value.
- Email - In the value you define the email address under which the emails will be sent. The email address must be an alias on the mailbox. Required attribute.
- Reply Email - You define the email alias in the value. If an email is sent from the system and the email recipient specifies Reply, this address is used.
- Automail template - Option to select the template that will be sent.
- Active - Option to indicate if the email inbox is active in the application.
- Send for someone - If this option is active, the address of the currently logged in user will be used as the sender from the system users. This option must be supported by the email server (send on behalf).
- Displayed name - define the name that will be displayed to the recipient next to the email address.
- Mailbox Connection Protocol - Choose between POP3 and MAPI.
Outgoing mail
In this section you set the connection to the mailbox for outgoing mail. The setting options are Basic authentication (SMTP) or OAuth2.0.
Basic Authentication (Smtp)
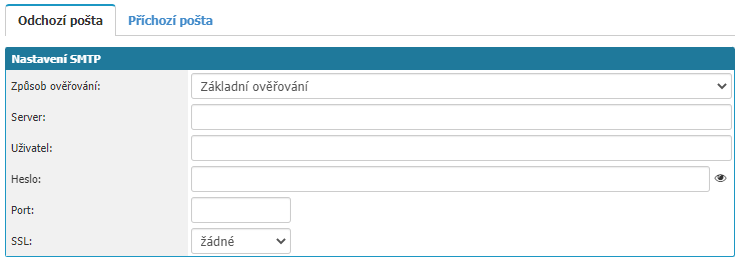
- Server - the value is set to SMTP server.
- User - the value is used to set the login to the mailbox.
- Password - you set the password for login to the email box.
- Port - you set the port for the SMTP server.
- SSL - set the encryption settings. You can choose between SSL/TLS, STARTTLS or none.
OAuth2.0

The OAuth2.0 setup works by selecting existing credentials in the settings. If you haven't created credentials yet, you can create them via the + option, or if you want to edit existing credentials you can open and edit them via the pen option.
In the login settings window we can find the attributes:
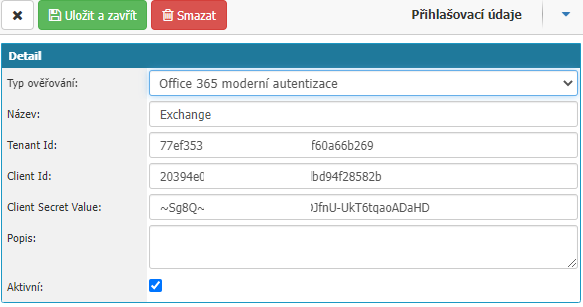
- Authentication Type - Choose between Microsoft 365 and Google settings.
- Name - user defined name of the given login credentials.
- Tenant Id (Microsoft 365) - enter the Tenant Id that is generated in the Azure portal settings.
- Client Id (Microsoft 365) - enter the Client ID in the field that is generated in the Azure portal settings when you register the application in the Azure portal.
- ** Client Secret Value (Microsoft 365) - enter the Client Secret Value that is generated in the Azure portal settings.
- ** Service Account Email (Google) - enter the Service Account Email from the Google account settings in the field.
- ** Private Key (Google) - enter the Private Key that you generate in the Google account settings.
- Description - option to enter a description for the login credentials to make administration easier.
- Active - Select whether the login credentials are active in the INSIO application.
Incoming mail
In this section, we set the method of authenticating the email box for incoming mail. The authentication options are Basic Authentication and OAuth2.0.
Basic Authentication - Pop3
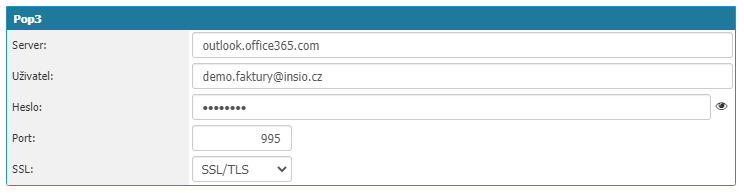
- Server - the value is set to SMTP server.
- User - the value is used to set the login to the mailbox.
- Password - you set the password for login to the email box.
- Port - you set the port for the SMTP server.
- SSL - set the encryption settings. You can choose between SSL/TLS, STARTTLS or none.
OAuth2.0 - Pop3
To set up OAuth2.0 it is necessary to select login data from sensam or create new ones.
Basic authentication - MAPI
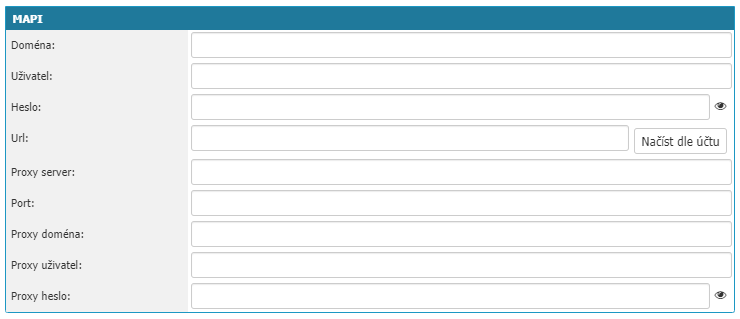
- Domain - the value is set to the domain of the mailbox.
- User - the value is used to set the login to the mailbox.
- Password - you set the password for login to the mailbox.
- Url - you define the URL of the MS Exchange server in the value. The option load by account is used to automatically fill in according to ?
- Proxy server - you define the Proxy server in the value.
- Port - set the port for MAPI into the value.
- Proxy domain - set the domain of the Proxy server in the value.
- Proxy user - the value sets the login for the Proxy server.
- Proxy password - you set the password for the Proxy user.
OAuth2.0 settings cannot be used for MAPI.
OAuth2.0 - EWS
EWS can only be used in the settings OAuth2.0. You must select login credentials or create login credentials to set them up.
Top bar

Here you will find options to close settings without saving changes - Cross, save settings - Save and close, delete the mailbox from the application - Delete and the option to test the mailbox connection - Test connection. Caution - in case of incorrectly entered data, this operation may take a longer time, up to several minutes, and it may seem that the application is stuck - it is not, the application is waiting for a response from the servers.