Menu settings determine the final appearance of the left menu in the web app or the home screen menu in the mobile app. In administration, the menu definition is in a tree structure and can have a maximum of two levels (if you don't count the root entries). A menu is linked to a profile and each profile can only have one menu. Menu settings can be found in Administration menu > Portal > Menu settings (links).
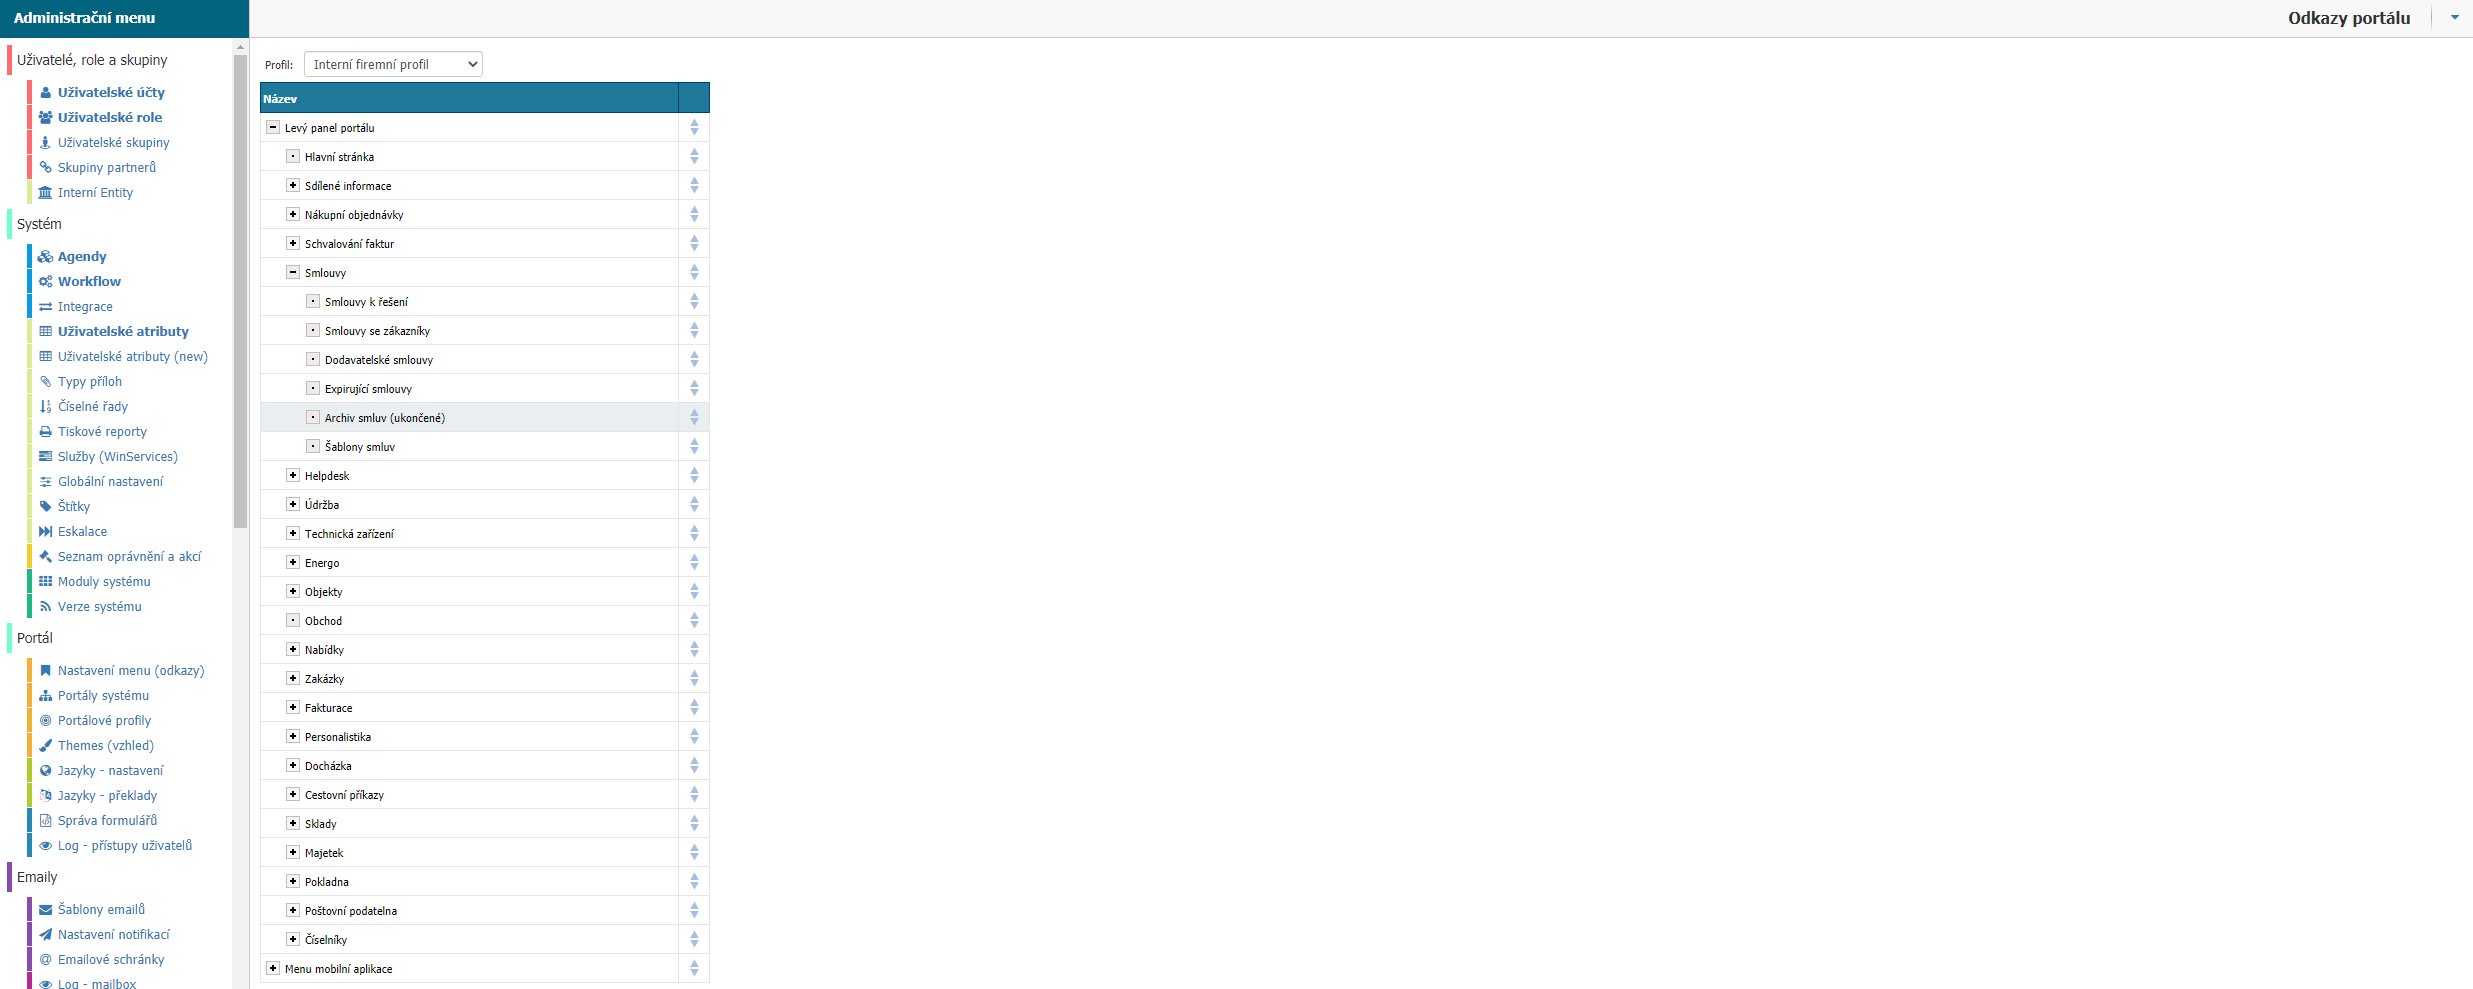
When you open the Settings menu, you will find the Profile option at the top, where you select the profile you are setting the menu to. In the tree structure, you can use the + option to view the subordinate menu links. Via the option on the right, blue up and down arrow, you can move individual menu links in the tree structure. Further settings for each link are available by right-clicking on the menu link.
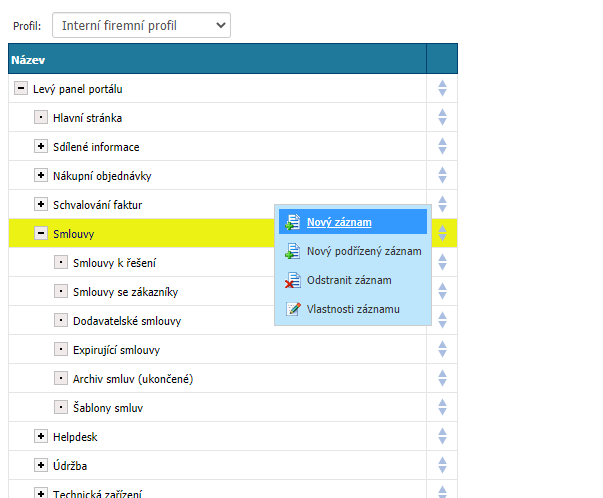
New record
The option opens the new link settings. If you want to create a child menu link, select New child record, the setup window is the same.
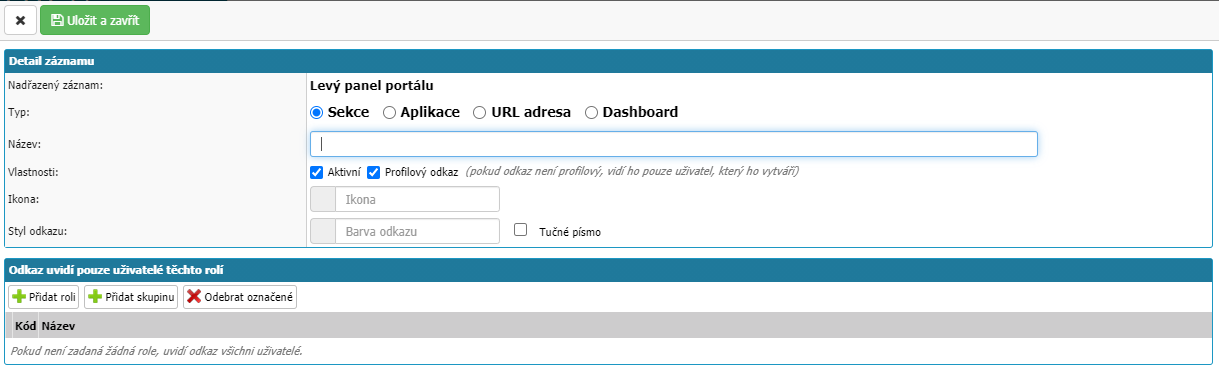
Record detail

Here you can find the basic settings of the menu link:
- Assigned record - the value is only information about the parent menu link.
- Type - setting the type of the link. There are 4 types of link in the application.
- Section - is a menu item that groups other child links.
- Application - is a link to a specific form in the application.
- URL address - the menu link will point to the URL address you set.
- Dashboard - the menu link will refer to the Dashboard.
Other settings depend on the selected type.
Only users of the following roles will see the link

Here you can find settings to limit the visibility of the menu link for specific roles and groups in the application. The Add Role/Group options will open a list of roles or groups in the application from which you can select. The Remove Selected option removes the selected role or group from the list of roles/groups that should see the menu link. To make a selection, select the leftmost option for each role/group in the list.
Sections
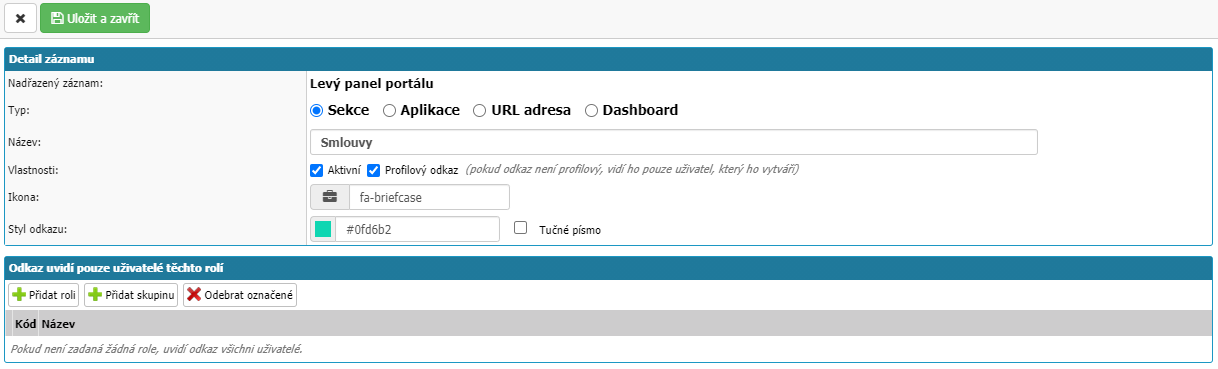
It is only used for grouping other menu links. You can set the section:
- Name - define the name of the section that will be displayed in the menu.
- Properties - there are two options. The first is whether the section will be active. The second is whether the section will be a profile link, if you disable the Profile link option, the link will only be visible in the menu to the user who created it.
- Icon - option to select the icon that will be displayed in the left menu of the link.
- Link Style - option to select the color that will be displayed in the left menu of the link.
- Bold Font - option to enable bold format on the link title text that is displayed in the left menu.
Applications

is a link to a specific form (by form we mean an application document detail or overview, for example: invoice overview, new order, helpdesk request, attendance calendar ... which is not a dashboard) in the application. Individual forms are directly linked to the application module. By selecting Form: Search, a window of form selection will open. In the overview you will find all the forms that are available according to the module that you have active in the application. You can filter by Module. Leave the Only active and Only main links options selected.
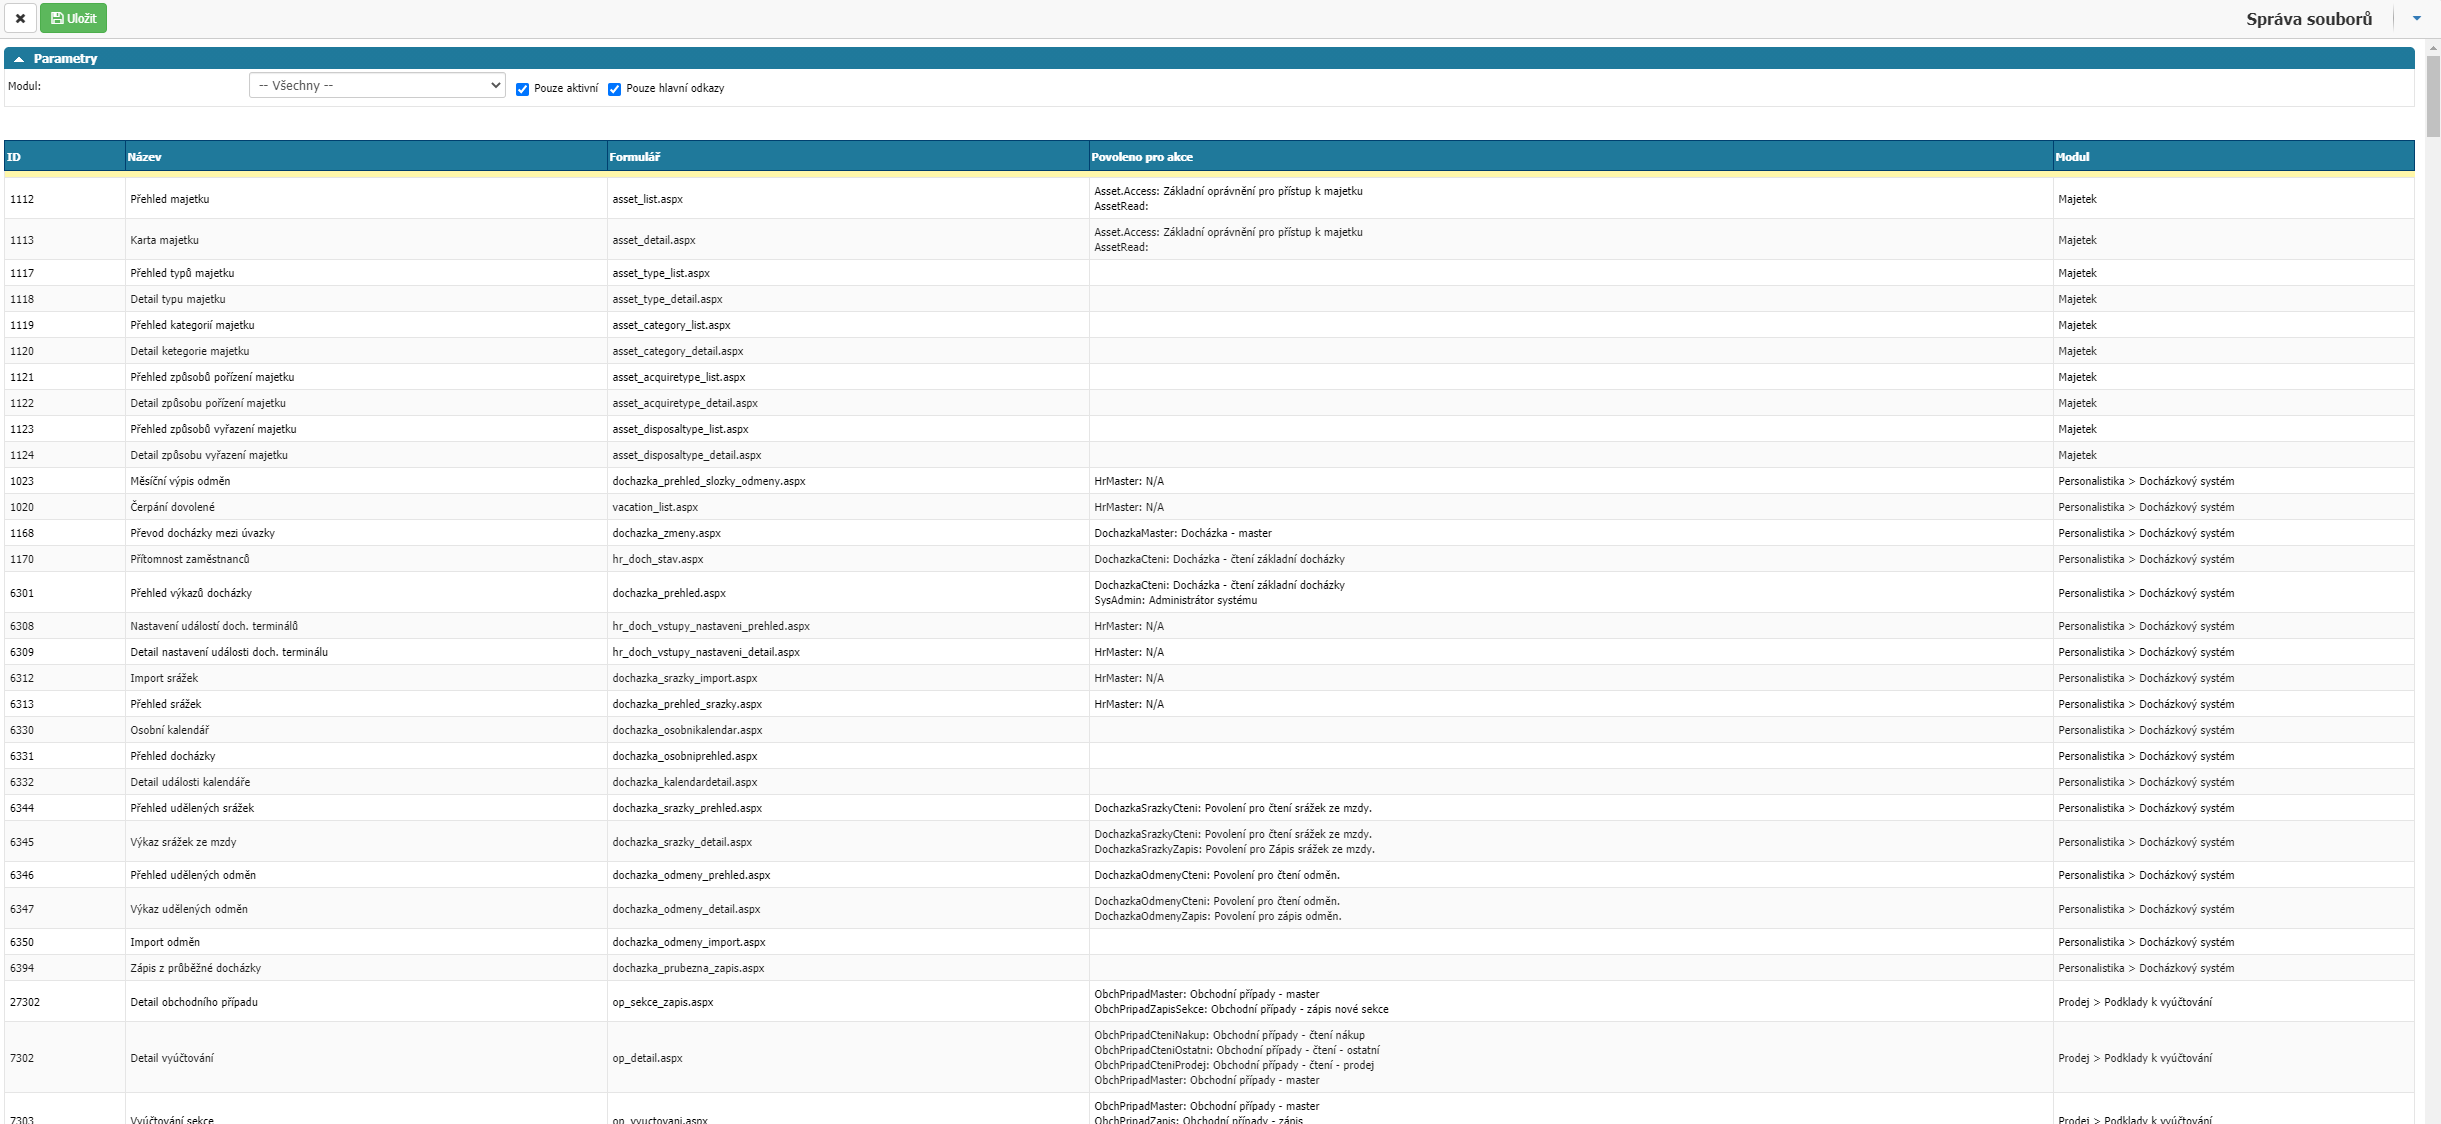
The list is divided into columns:
- ID - numeric ID of the form.
- Name - the name of the form.
- Form - the exact name of the form the application works with. It is used only for troubleshooting.
- Actions allowed - the column contains all permissions that allow users to access the form. If a user is to have permissions to open a given menu link to a form, the user must either have permissions set directly or inherited from the role/group the form has assigned in this column. If the form has multiple permissions assigned, users only need one of them to access the form. If the form has no permissions assigned, you can assign permissions to the form via the settings in Administration Menu > Portal > Manage Forms.
- Module - the module to which the form belongs.
Select the form in the list by double-clicking the left mouse button.
Next, you can configure the application:
- Name - define the name of the form that will be displayed in the menu.
- Properties - there are two options. The first is whether the form will be active. The second is whether the form will be a profile link, if you turn off the Profile link option, the link in the menu will only be visible to the user who created it.
- Icon - option to select an icon to be displayed in the left menu next to the link.
- Link Style - option to select the color that will be displayed in the left menu of the link.
- Bold font - option to enable bold format on the link title text that is displayed in the left menu.
- User URL - here you can define the URL as a link to open directly the menu link. Enter the link in the format {application address}/GoTo/{User URL}, for example https://demo.intrasoft.cz/GoTo/Calendar
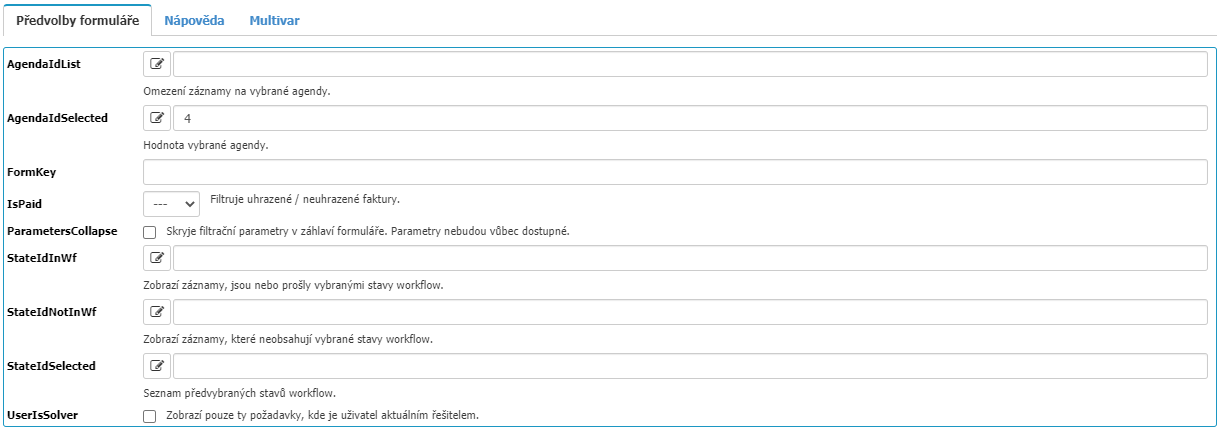
After setting up and saving the application, most forms have additional settings which can be found in the Form Preferences section. This is most common with report forms, where you can set up options such as report filtering. Each form has settings options exactly for itself and for all settings options you will find a short description of what they are for.
URL address
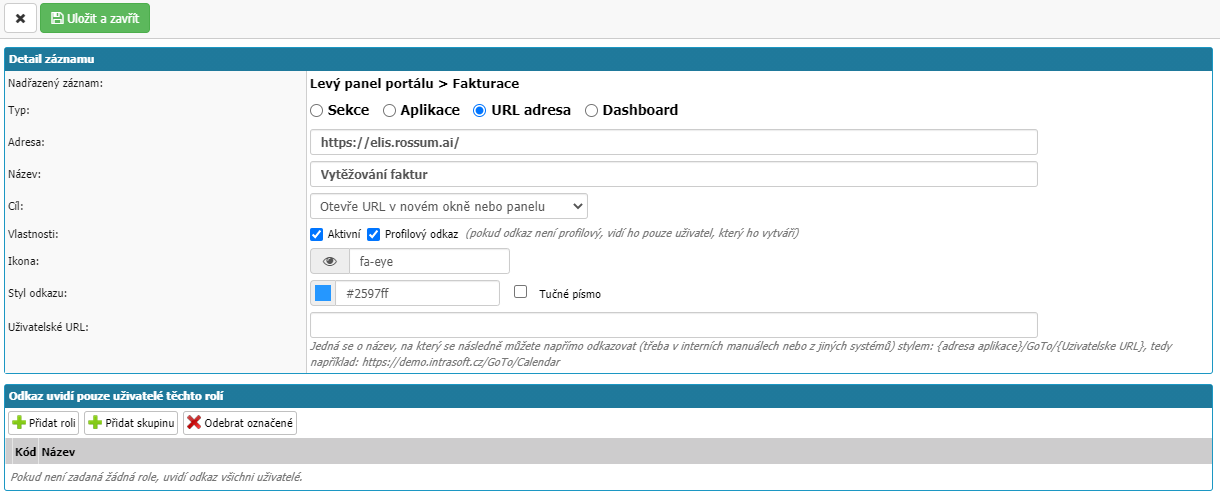
Allows you to set the menu link to open in the application or in a new browser window.
- Address - here you can set the URL address to open the menu link.
- Name - you define the name of the form that will be displayed in the menu.
- Object - set where the link should be opened. The options are: Opens the URL within the application, Opens the URL in a new window or panel, and Redirects the entire application to the specified URL.
- Properties - there are two options. The first is whether the form will be active. The second is whether the form will be a profile link, if you disable the Profile link option, the link in the menu will only be visible to the user who created it.
- Icon - option to select an icon to be displayed in the left menu next to the link.
- Link Style - option to select the color that will be displayed in the left menu of the link.
- Bold Font - option to enable bold format on the link title text that is displayed in the left menu.
- User URL - here you can define the URL as a link to open directly the menu link. Enter the link in the format {application address}/GoTo/{User URL}, for example https://demo.intrasoft.cz/GoTo/Calendar
Dashboard
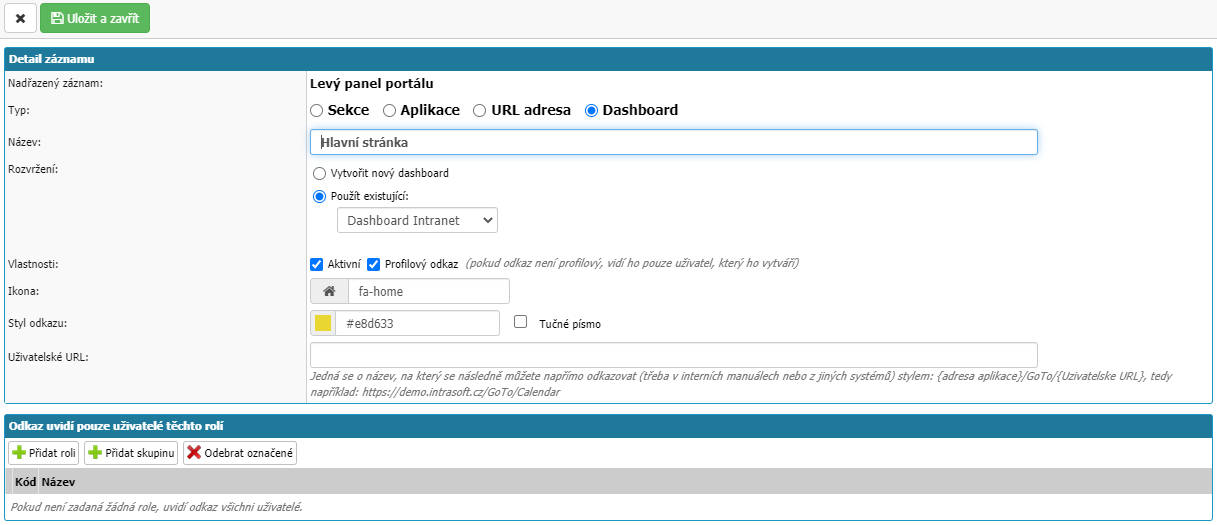
Option to create a menu link on which users can find the set widgets.
- Name - define the name of the form that will be displayed in the menu.
- Display - you have the option to create a new dashboard where after creating the menu link it is necessary to open the menu link and then set the individual widgets or the option Use existing, where after opening the menu link you will already have the widgets set on the page which you can only reconfigure. With the Use Existing option, you select an existing dashboard in the application from the pick list.
- Properties - there are two options here. The first is whether the form will be active. The second is whether the form will be a profile link, if you disable the Profile link option, the link in the menu will only be visible to the user who created it.
- Icon - option to select an icon to be displayed in the left menu next to the link.
- Link Style - option to select the color that will be displayed in the left menu of the link.
- Bold Font - option to enable bold format on the link title text that is displayed in the left menu.
- User URL - here you can define the URL as a link to open directly the menu link. Enter the link in the format {application address}/GoTo/{User URL}, for example https://demo.intrasoft.cz/GoTo/Calendar
Delete entry
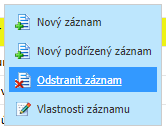
The option removes the menu link from the application. If the menu link has child menu links, you must first delete all child menu links.
Record Properties
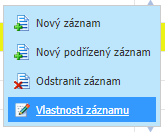
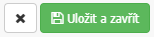
The option opens a window to change the settings of the selected menu link. In the settings window at the top you will find an option to cancel the changes to the settings - Cross and an option to save the changes to the settings - Save and close.