
The app can generate notifications for users when changing workflow status and insert a note. Notifications are sent from the application in the form of an email, so it is necessary to have an email box set up in the system through which the application will send notifications. The content of notification emails can be defined in the email templates. The moment a notification is defined in the application and is active, the application will automatically follow the notification and send emails based on the defined conditions. For settings and an overview of notifications in the application, see Administration menu > Emails > Notification settings.

Overview
In the overview you can find all the notifications that are set up in the app.

The list is divided into columns in which you can filter or sort the list according to them:

- Id - Notification ID, a unique identifier in the system.
- Name - The name of the notification, which was defined when it was created.
- Role - The roles that are selected as notification recipients in the notification settings.
- Users – Users who are selected as notification recipients in the notification settings.
- Agenda – agenda that is selected as a condition in the notification settings.
- Conditions - workflow states that are selected as a condition in the notification settings.
- Active - flag whether the notification is active.
- Scroll down - option to change notification settings.
New record
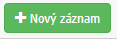
The option opens a dialog where you can set up a new notification in the app.
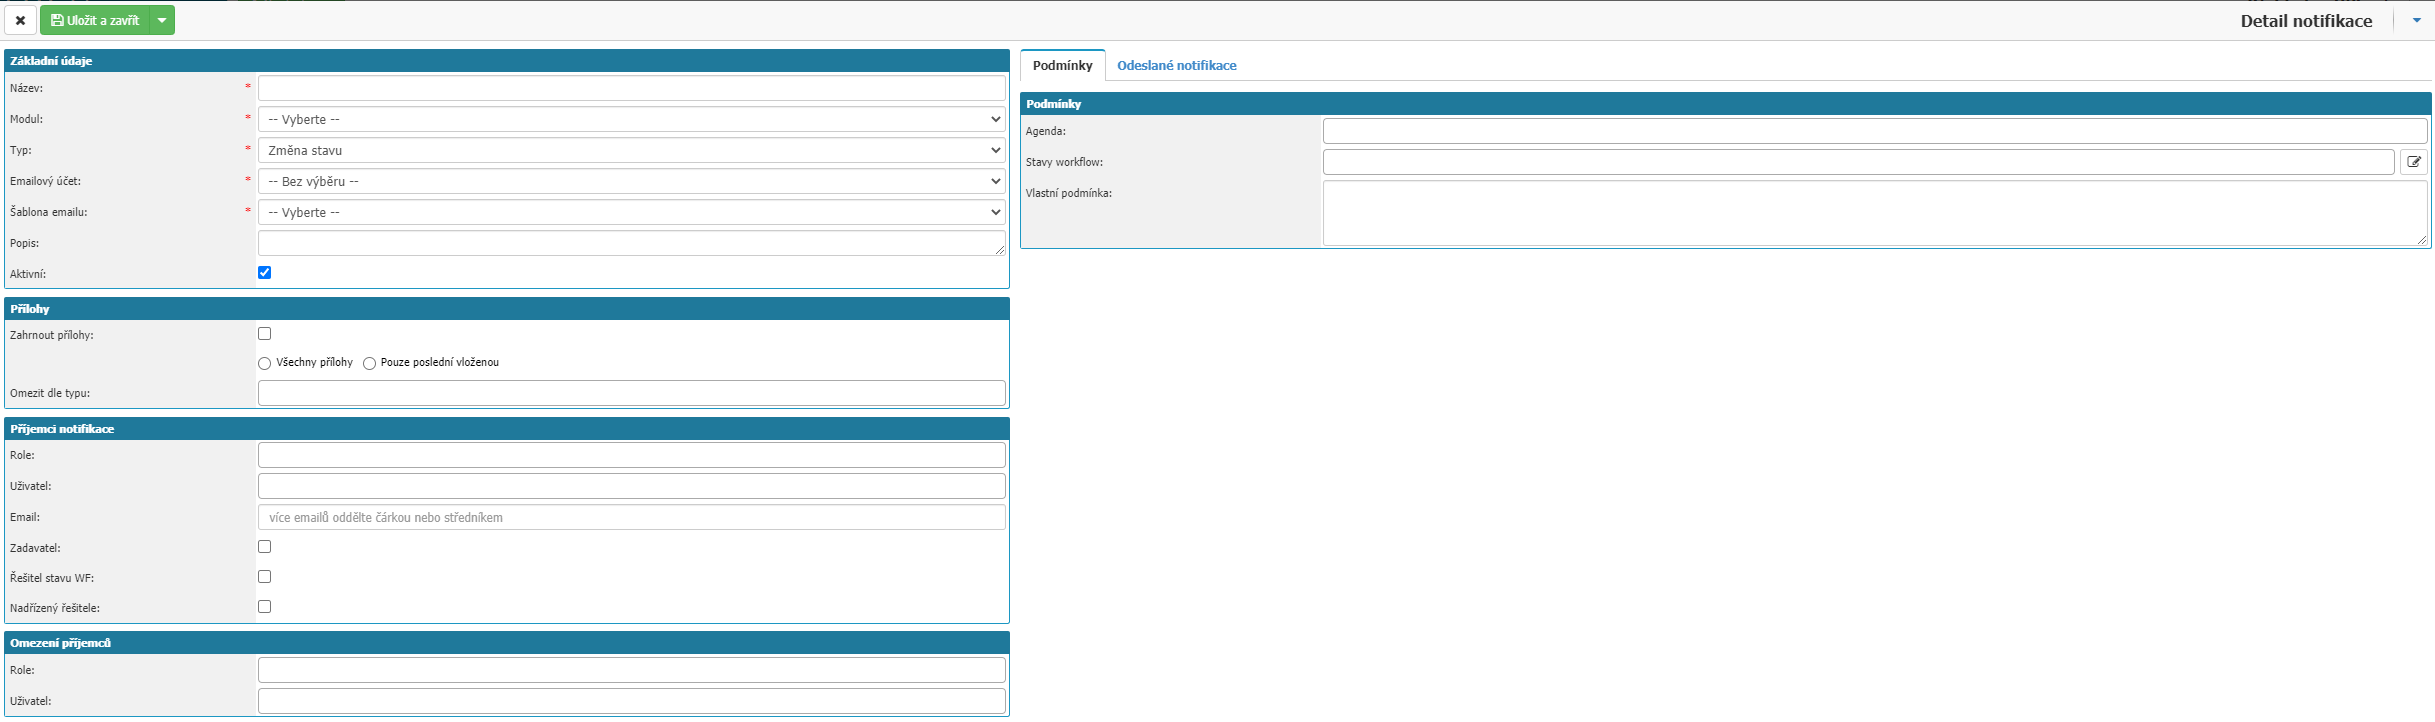
Basic data

- Name - define the name of the notification. Required value.
- Module - select the module for which the notification will be set. Required option.
- Type - type of notification, whether it will be triggered on status change or note entry. Required option.
- Email account - choice of email account from which the notification will be sent. In the selection you can find all active email accounts in the application. Required option.
- Email template - selection of the template to be used in the notification. The selection depends on the selected module.
- Description - description of the notification for the orientation of others users.
- Active - select whether the notification is active in the app.
Attachments

Option to set whether attachments that are in the request/document should be included in notification emails. You can enable attachments via the Include attachments option. You can set whether to send all attachments or Only the last one inserted. Restrict by type you have the option to restrict which types of attachments are sent in the notification.
Notification recipients
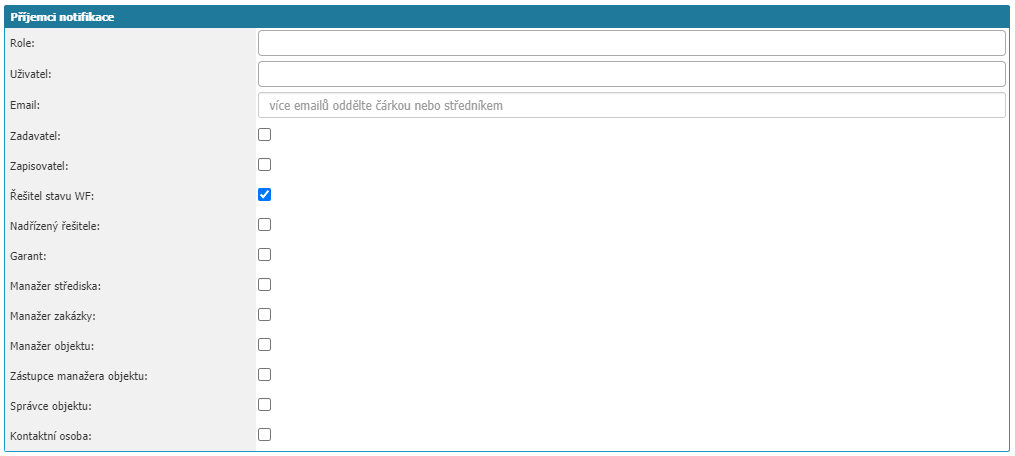
Multiple role options that define to whom the notification will be sent, users list of email addresses, etc. Notification will be sent to the complete list defined in this setting. The options are dependent on the selected module.
- Role - option to select the user roles to which the notification will be sent.
- Users - the ability to select the users to whom the notification will be sent.
- Email - option to define a specific email address where the notification will be sent. Separate multiple email addresses with a comma.
- Requester - if selected, the notification will be sent to the requestor.
- Status solver WF - if selected, notification will be sent to the workflow status solver.
- Solver's supervisor - if selected, the notification will be sent to the user who is defined in the organizational structure as the supervisor of the user who is the solver of the workflow state.
- Recorder - if selected, the notification will be sent to the recorder of the request.
- Guarantor - if selected, the notification will be sent to the guarantor of the request.
- Center Manager - if selected, the notification will be sent to the manager of the center assigned in the document.
- Contract Manager - if selected, the notification will be sent to the contract manager that is assigned in the document.
- Object Manager - if selected, the notification will be sent to the object manager that is assigned in the document.
- Object manager representative - if selected, the notification will be sent to the object manager representative that is assigned in the document.
- Object manager - if selected, the notification will be sent to the object manager who is assigned in the document.
- Responsible persons - the option to select a responsible person for the contract module.
- Contact Person - if selected, notification will be sent to the contact person listed in the Helpdesk request.
Restriction of recipients

role/roles settings section, list users or a combination of them, to whom the notification will be sent - restricts the settings against the Notification Recipients section for a more precise selection of recipients.
Conditions
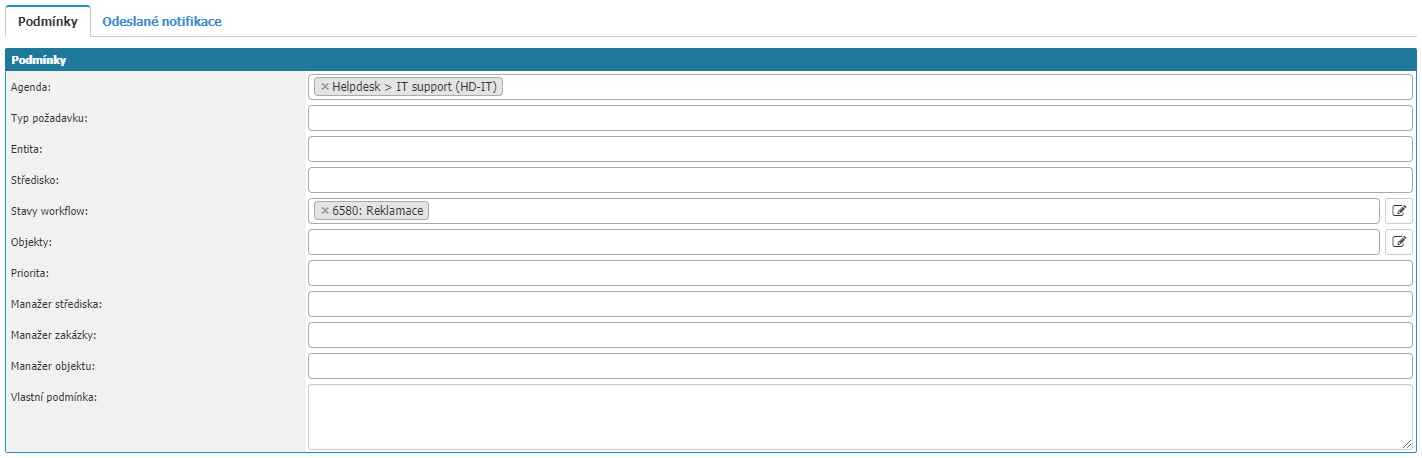
In this section, you set the conditions that must be met for the notification to be sent from the app. The list of conditions depends on the selected module.
- Agenda - option to select the Agendas on which the notification will be sent. Option to select multiple agendas.
- Entity - option to select Entity, when the notification will be sent. Option to select multiple Entities.
- Workflow states- define the state of the workflow from which the notification will be generated. Option to select multiple workflow states. Notification will be sent every time a request or document gets into one of the selected states.
- Request Type - option to select the type of request, when the notification will be sent. Option to select more than one type.
- Center - option to select the center at which the notification will be sent. Option to select multiple centres.
- Objects - option to select the objects at which the notification will be sent. Option to select multiple objects.
- Priority - option to select the priority of the request at the helpdesk at which the notification will be sent. Option to select multiple priorities.
- Center Manager - option to select the manager of the centers at which the notification will be sent. Option to select multiple managers.
- Contract manager - option to select the manager of the contracts on which the notification will be sent. Option to select more managers.
- Object manager - option to select the manager of objects when the notification will be sent. Option to select multiple managers.
Sent notifications

A tab showing when the selected notification has already been sent. The overview is divided into columns:
- Account - the name of the mailbox from which the notification was sent.
- From - the email alias under which the notification was sent.
- To - the email address to which the notification was sent.
- Subject - the subject of the email message.
- Sent - flag if the email has already been sent from the application. Date and time when the email was sent from the application.
- Created - date and time when the notification was created in the application.
- Mistake - flag if the notification was not sent from the application due to an error.
- Sheet - option to expand the email message.
Top bar

Here you will find an option to close the settings without saving the changes - Cross, an option to save the settings - Save, an option to create a copy of the notification in case you need to create the same notification for another module or a similar notification - Create copy and an option to delete the template from the application - Delete.