
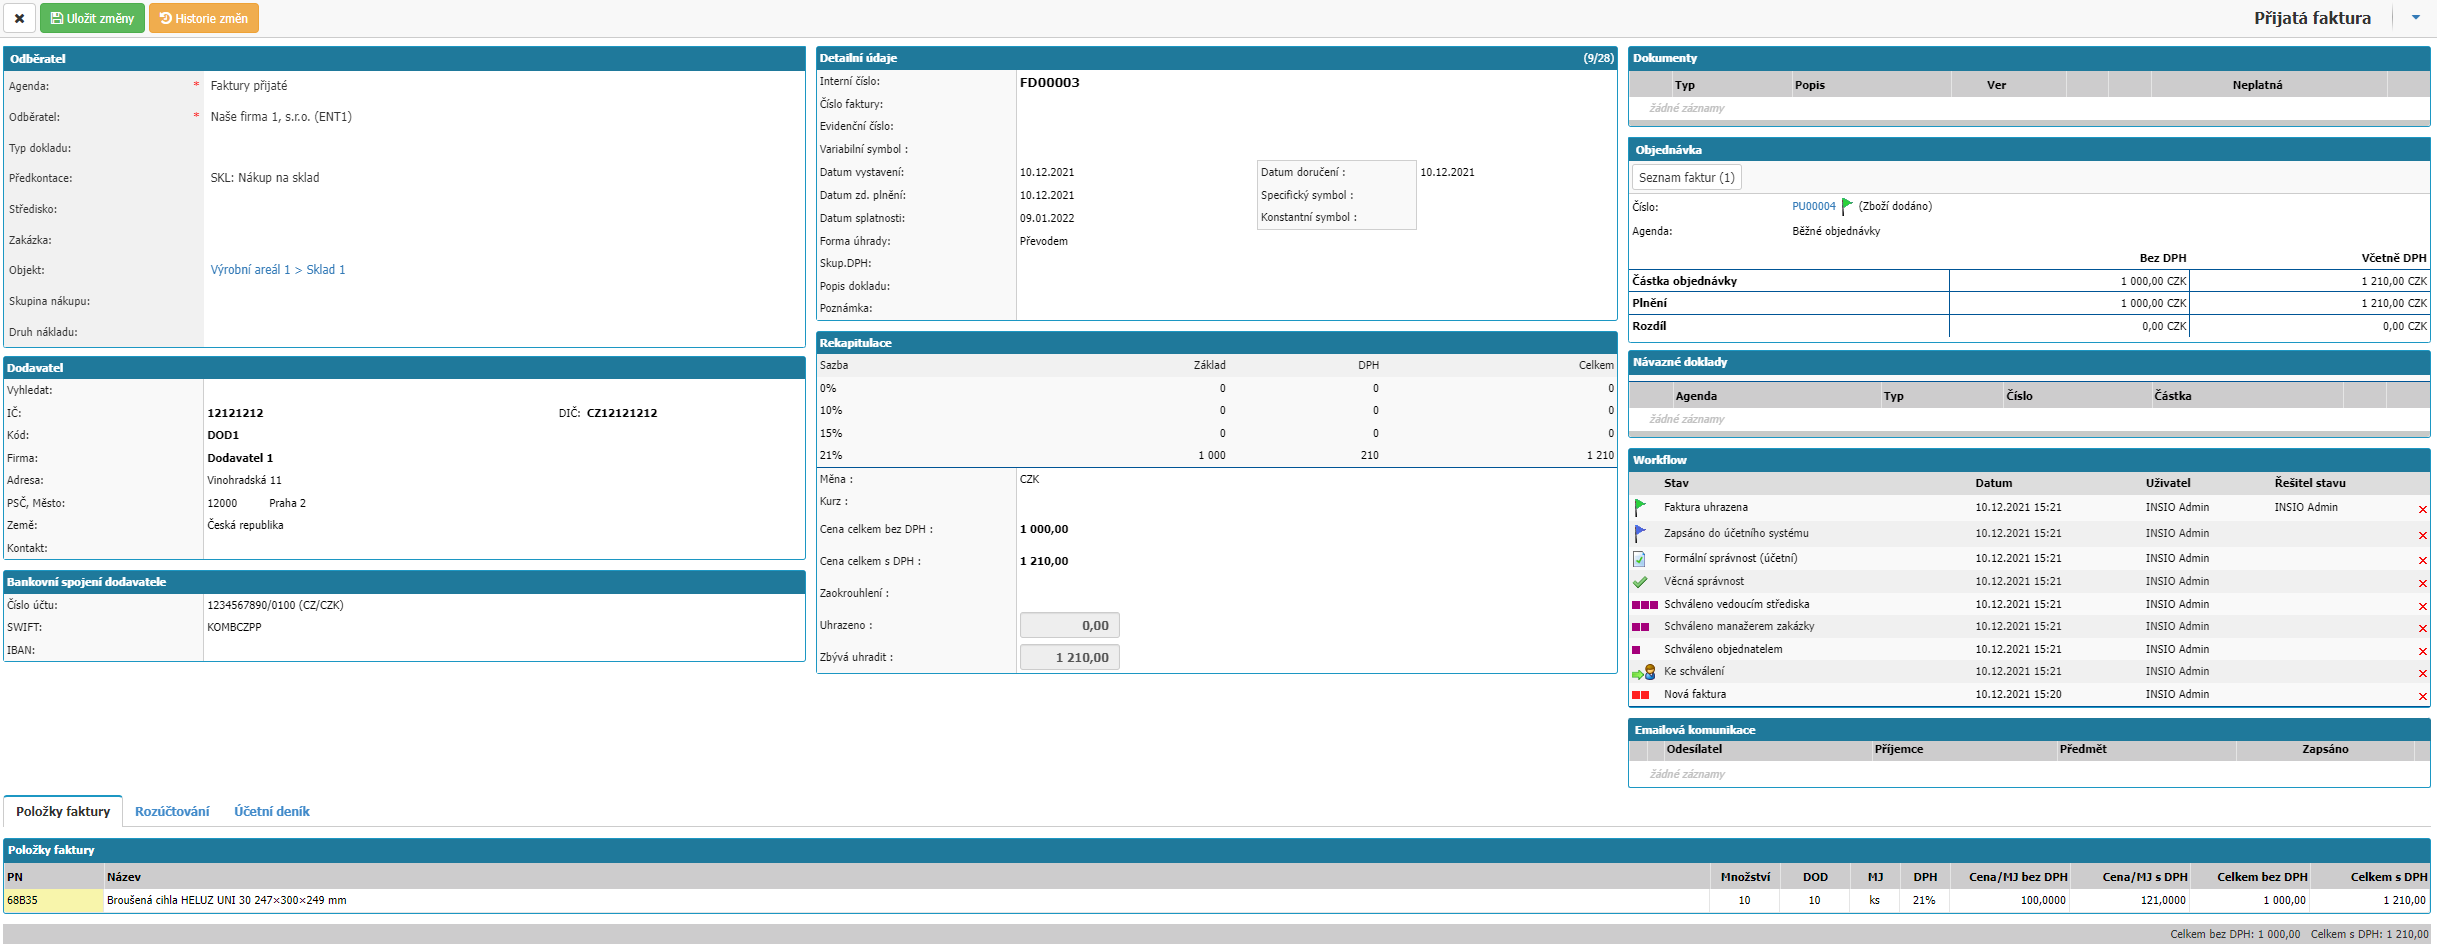
Each invoice received in the system carries a summary of information and settings that are available in the invoice detail, where the values can be entered or modified. To create a new invoice, you can bring up a link to the invoice_inc_detail.aspx form in the left menu or via the Received Invoice Summary form invoice_inc_list.aspx where you will find the New Document option.
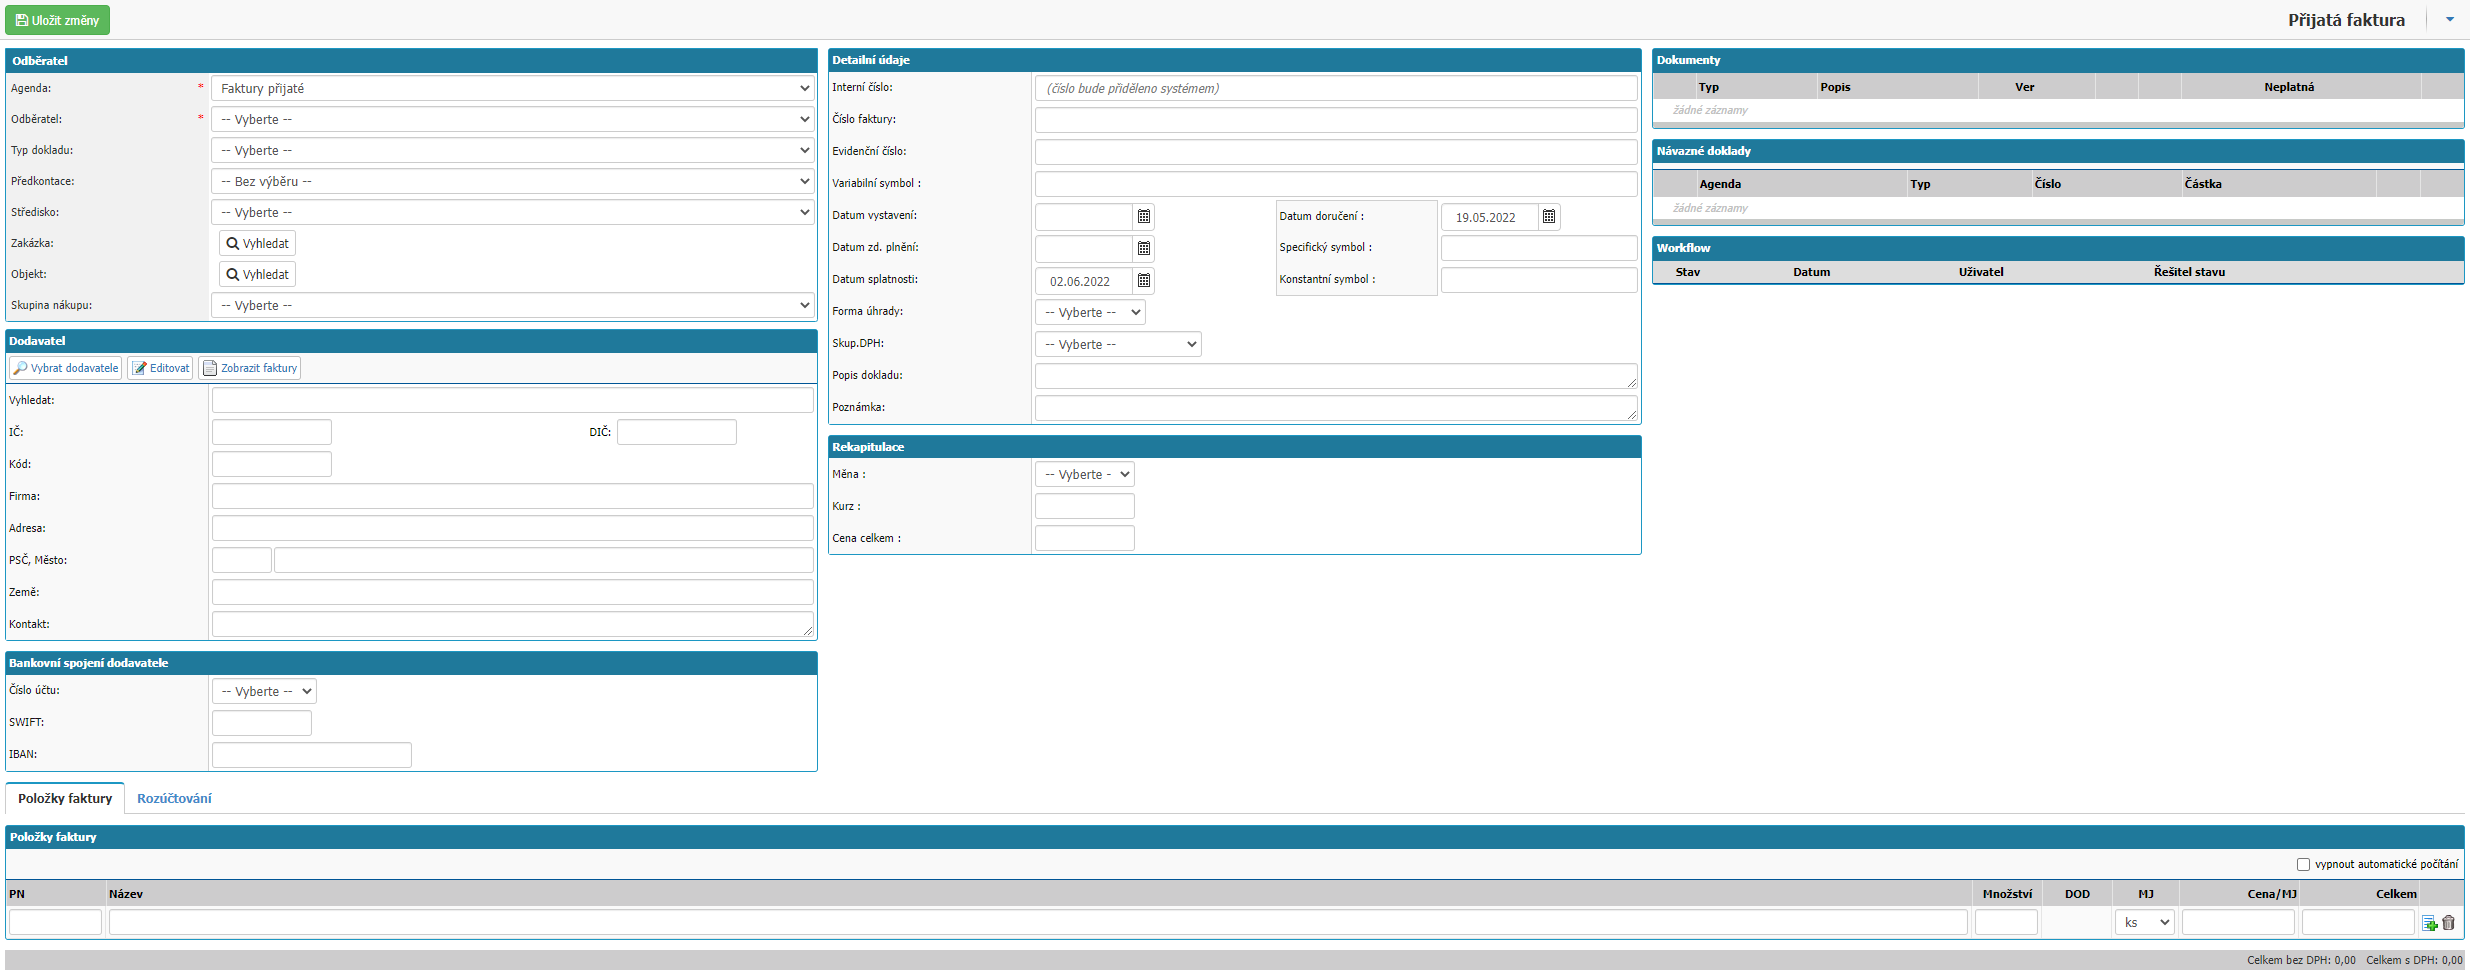
New invoice values received
Invoice detail is divided into sections Customer, Supplier, Supplier's bank account, Details, Recap, Documents, Returns, Workflow, Invoice Items and Billing.
Subscriber
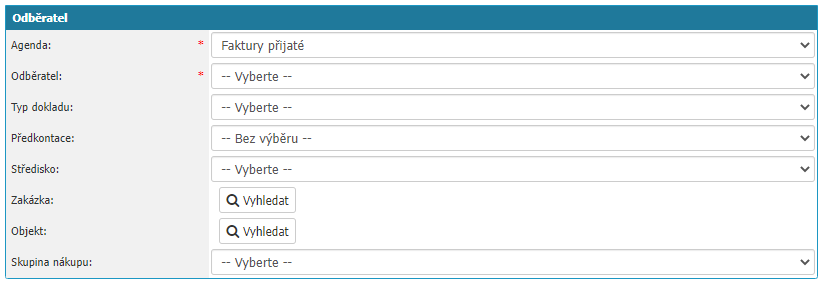
- Agenda - selection of the agenda according to which the invoice will be managed.
- Customer - selection of the internal entity to which the invoice is issued.
- Document type - selection of the document type from the document type dial.
- Preconfirmation - option to select a preconfirmation from the preconfirmation dial.
- Centre - option to select the centre from the centre dial.
- Order - option to select an order from the order dial.
- Object - option to select an object from the object dial.
- Purchase group - selection option from the purchase group dial.
Supplier
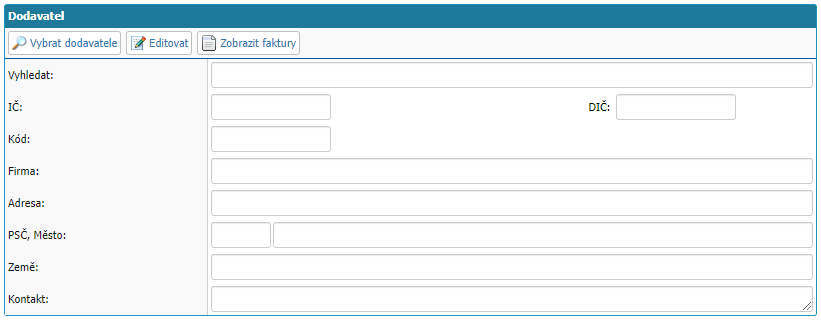
Supplier selection section on the invoice. You can select suppliers from the partners dial. You can open the diary via the select supplier button. If you want to create a new partner, you need to open the partner overview via the Select Supplier button and in the overview you will find the New record button at the top, through which you can create a new partner. Via the Edit button you can open the detail of the selected partner and you can edit its parameters. Use the View Invoices button to open an overview of invoices from the selected partner.
The Search field is used to search the list of partners by partner name. You must enter at least 2 characters in the field to search.
The fields Number, Tax ID, Code, Company, Address, Postcode, City and Country are filled in according to the selected partner and if you make a change in any of the fields, the change will not be overwritten. It is only possible to change the partner via the invoice detail via the Edit button.
The contact field is a text field where you can enter a contact for the supplier which will only be saved in the invoice, not in the partner settings.
Supplier's bank connection

Option to select the supplier's bank connection from the bank connections stored with the partner. If you do not have any bank connection set up for the partner, you can again click on the Edit option on the partner settings and create a bank connection for the partner.
Details
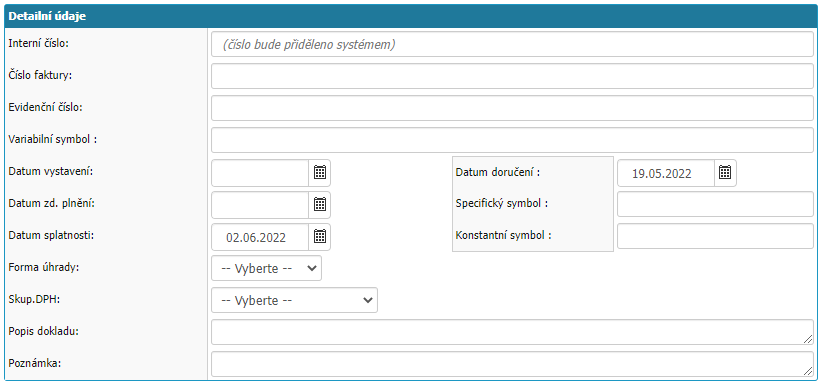
- Internal number - this is an internal number of the system, which is generated automatically by the system based on the settings of the agenda -> record numbering.
- Invoice number - field for the possibility of entering the invoice number that is specified on the document.
- Invoice number - field for the possibility of entering the invoice registration number. The system automatically writes the value from the Invoice Number field into this field. The value is subsequently editable by the user.
- Variable symbol - field for the possibility of entering the variable symbol. The system automatically writes the value from the Invoice Number field into the field. The value is subsequently editable by the user.
- Date of issue - selection of the date of issue of the invoice.
- Invoice date. Date of taxable transaction - selection of the date of taxable transaction. The system automatically writes the value from the Date of issue field in the base. The value is subsequently editable by the user.
- Payment due date - selection of the invoice payment due date. The system automatically adds the value in the base setting as a calculation of the value Delivery date + due date shown on the purchase order that is associated with the invoice. If no due date is specified on the purchase order, then it is the calculated Delivery Date + Due Date specified on the contract that is associated with the invoice. If there is no due date listed on the contract, then it is the calculated Delivery Date + Due Date listed on the selected supplier's invoice. If there is no due date listed on the supplier either, then it is a calculation of Delivery Date + 14.
- Delivery Date - selection of the invoice delivery date, the system automatically pre-fills the current date. The value is subsequently editable by the user.
- Specific symbol - field for entering a specific symbol.
- Constant symbol - field for entering a constant symbol.
- Reimbursement form - option to select the reimbursement form from the Types of reimbursement dial.
- VAT Group - option to select a VAT group from the VAT Groups dial.
- Document description - text field for user description of the invoice.
- Note - text field for inserting a user note to the invoice.
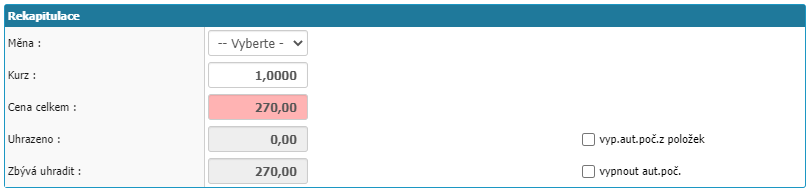
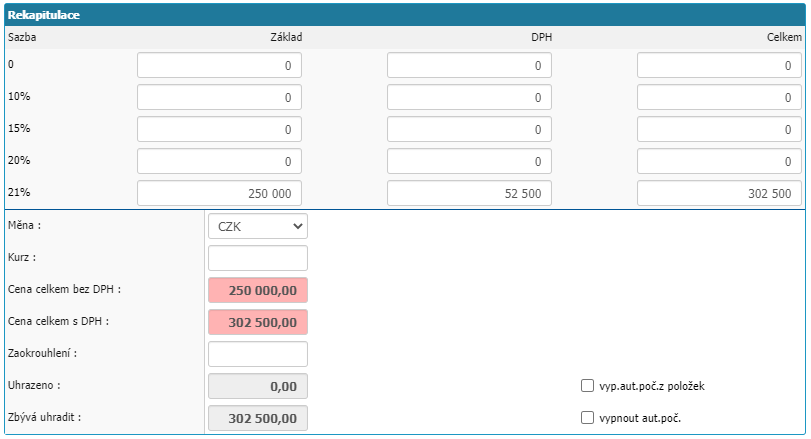
Recapitulation
The recapitulation section is used to recapitulate the amounts listed in the invoice or their line items. The fields displayed in this section depend on whether the selected Supplier is marked as a VAT payer or not. Here, the system also checks whether the partner was a VAT payer before the date of the VAT invoice or not. In the case of a VAT payer, the recapitulation is broken down into all the VAT rates that are set as active in the VAT codebook.
Documents

This section lists all attachments to the invoice.
You can add a document to an invoice using the Add Document option.
Attachments can be opened directly in the browser by double-clicking on the file name or by selecting Open Attachment. to open the attachment in a floating window. In the window you will find options for working with the document, such as zooming in and out or rotating the document, or options for downloading and printing the document.
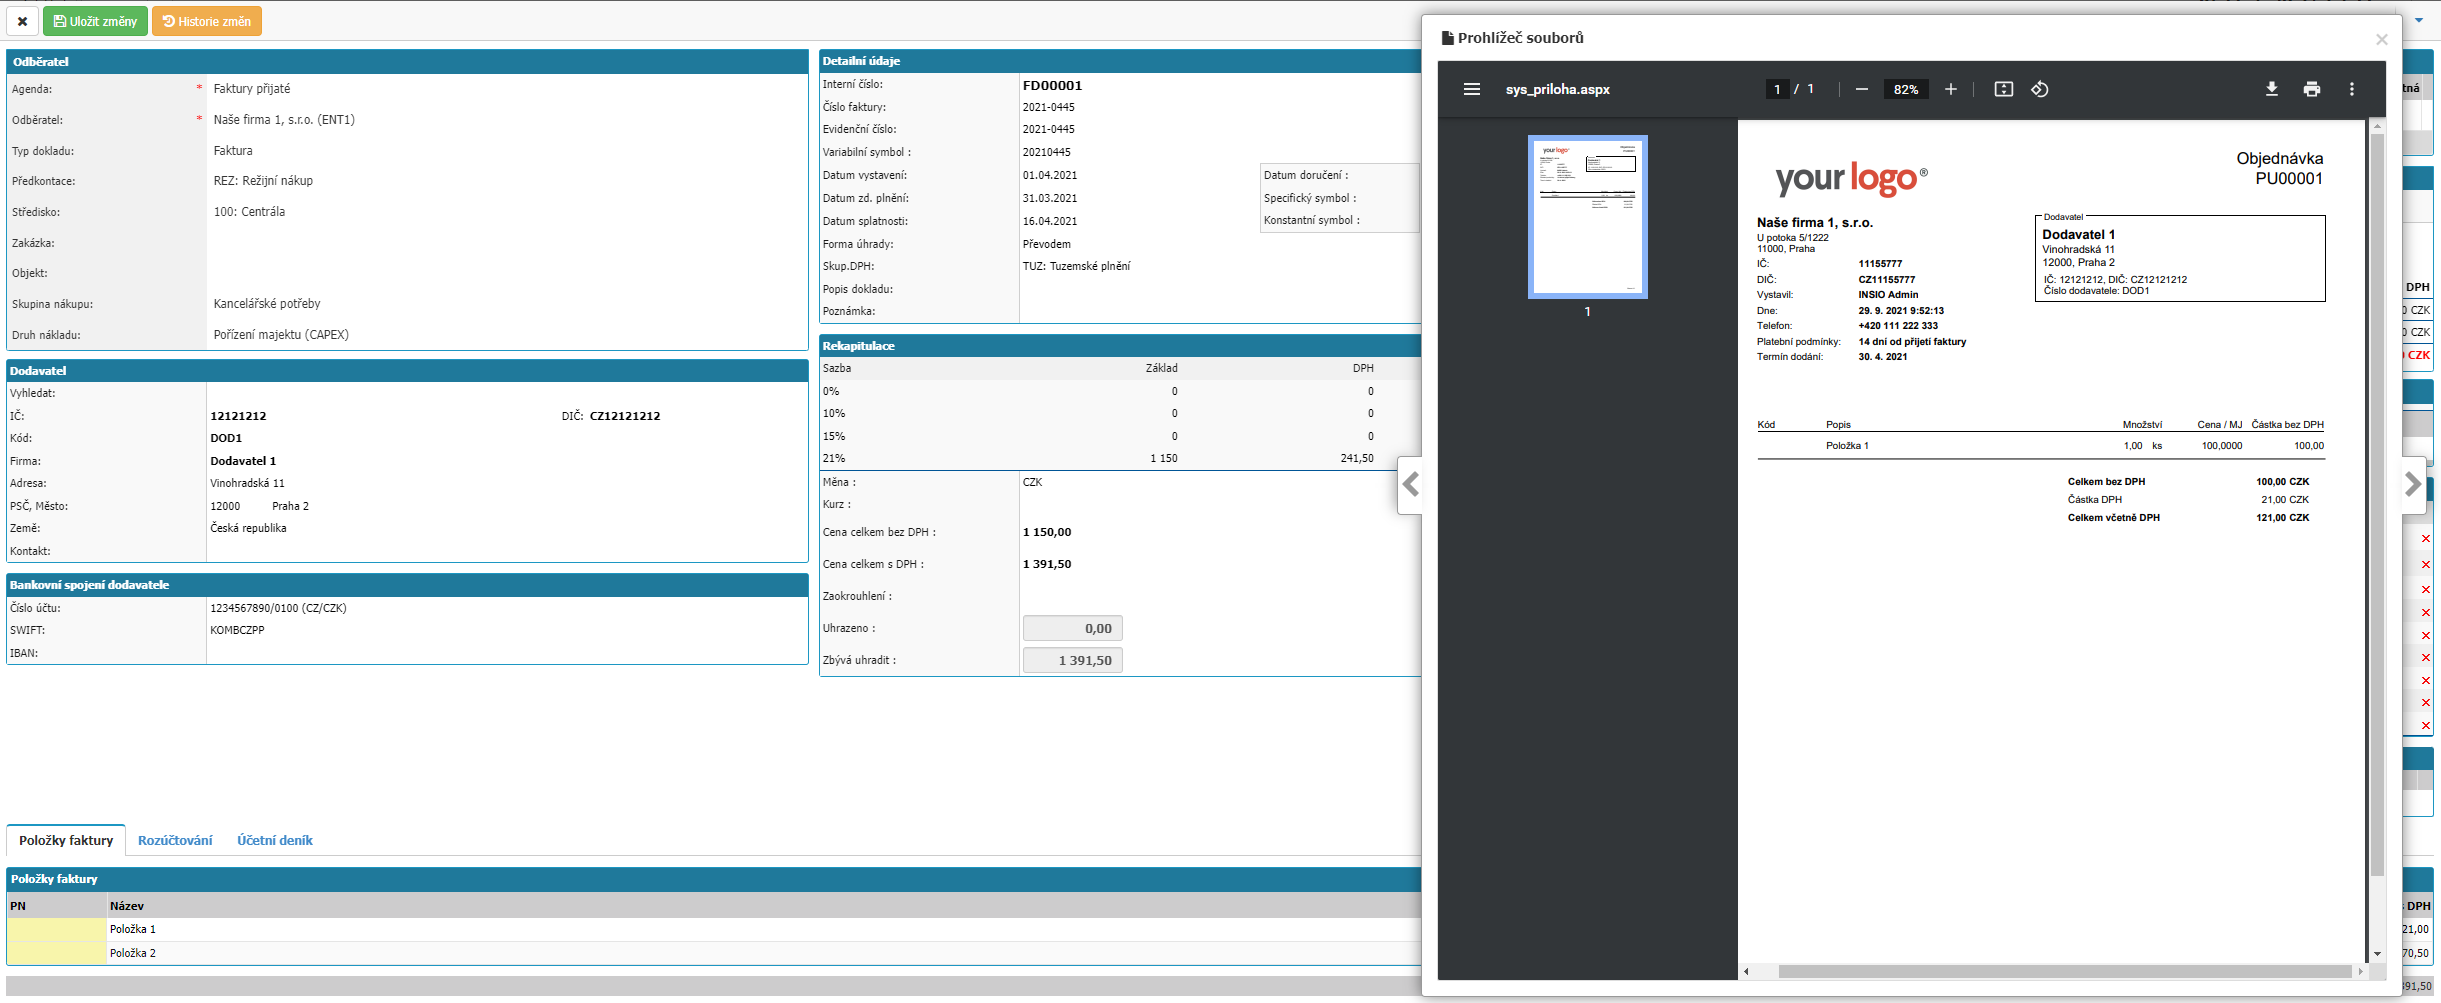
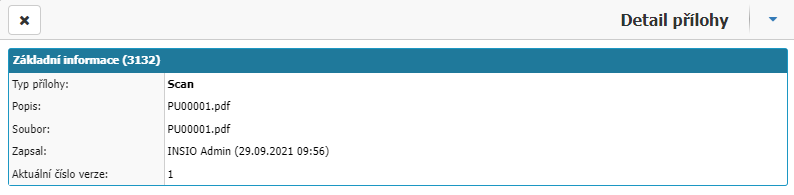
The Magnifier option opens a window with basic information about the attachment, such as a record of the user and the time by whom and when the attachment was written.
You can delete the document from the invoice using the Cross option.
The ability to add and delete attachments in an invoice is controlled by the permission settings and actions allowed in the agenda settings.
Order
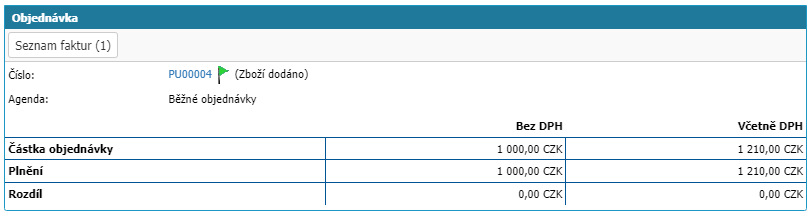
This section is used to assign an order to an invoice. The section is only available for invoices already saved in the application.
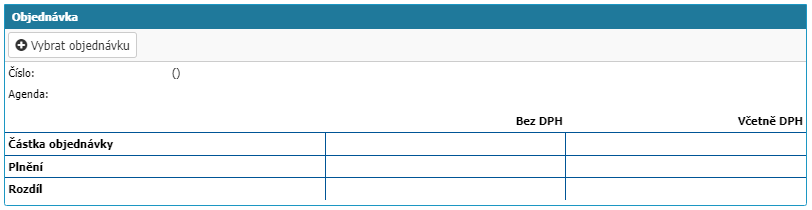
The Select Order option opens a window with an overview of the orders in the application that can be assigned to the invoice.

The Invoice List option opens a window with a list of all the invoices associated with the order that is assigned to the invoice.

The ability to select an order is based on the settings of the allowed actions for the agenda and the user permission settings.
Returns

This section displays all follow-up documents for the invoice. These may be additional invoices, for example, a prepayment invoice associated with an invoice, or contracts or mail delivered. The selection of a follow-up invoice or contract is again controlled based on the settings of the allowed actions for the agenda and the user permission settings. The inbox can only be assigned to an invoice from the inbox detail and then the inbox is also displayed in the received invoice detail.
Workflow
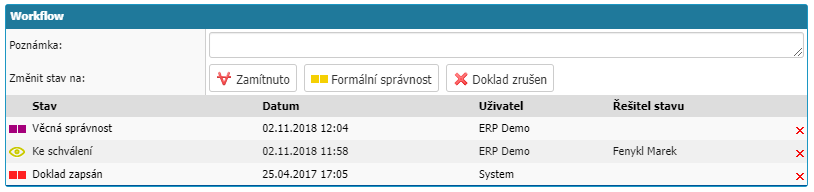
The section shows the workflow and the possibility to work with it. The individual statuses that the invoice has already passed through, the user who entered the status or the user who is the solver of the workflow status, the time record when the workflow status was entered, or a note from the user on the workflow status are written here. There are also buttons for subsequent workflow states and a field for writing a note. The workflow itself is managed according to its settings. The display of the available states is again linked to the workflow settings themselves and to the permission settings for the workflow states of the users.
Email communication

This section is only available for invoices already saved in the application. In the section you can find the email communication that is linked to the invoice in the system. You can send emails from this section and start a new email communication for this invoice. The possibility to send emails from the invoice detail is linked to the setting of allowed actions for the agenda and the setting of user permissions. Email communication cannot be deleted or removed from the invoice detail.
Invoice items

In the section you can enter the invoice items. The item can have attributes:
- PN - part number or item code.
- Name - name of the item.
- Quantity - numeric value of the quantity of the item.
- DOD - value delivered, the value is transferred only from the order that is linked to the invoice. In the agenda settings of the given invoice it must be set to copy data from the order.
- MJ - quantity unit of the item.
- Price/MJ - the price of the item for the selected quantity unit, for example price per piece or price per litre.
- Total - the total price of the item is calculated as Price/MJ times Quantity.
- Plus option - option creates a new line item.
- Basket option - option removes the assigned line item.
On the top right you will find the option to disable automatic counting. If you select this option, then the automatic counting of the Total in Items field will be turned off.
Settlement

In the section you can find the possibility to allocate invoice items with attributes Pre-account, Center, Order, Activity, Product and User attributes. Settings for posting can be found in the agenda settings.
At the top of the invoice detail you will find the options Cross, Save Changes, Delete Document, Send Email, Change History, Compare Data.

- Cross - closes the detail window of the given invoice without saving changes in the detail.
- Save changes - option saves all changes made to the document.
- Delete document - option deletes the document from the system. The option is linked to the permissions and settings of allowed actions in the agenda.
- Send email - the option opens a window for sending an email from the document. The option is linked to the permissions and settings of allowed actions in the agenda.
- Change history - option opens a window with an overview of changes in the document. Changes are displayed in a table that records the time record when the change occurred, the user who made the change, the Invoice Item where the change occurred and the Original/New Value.
- Data Comparison - option opens a window with comparison of data that was extracted by a machine reading program (DocuX, Rossum...), that was entered by the user and that was retrieved from the order. Data comparison can be enabled or disabled by selecting the option in the agenda settings.